Monday, February 28, 2011

Chocolate Chip Cookies with Chia seeds

ooooooohhhh! cookies!!!
Sometimes you just need some cookies. I've had a cookie itch (one of the better itches to get) for a few weeks, and Sunday is one of my favorite days to bake. I love being able to putter around the kitchen, unlike the weekdays where I have less time. These cookies turned out well, though I find cookies are always better the second day. Not entirely sure why, but a day old cookie is so much better, or at least the ones I've made are.

For these cookies, I used a small amount of chia gel. Not sure how many of you have used/heard of chia seeds but they are pretty nifty. And yes, chia seeds are from the cha-cha-cha-chia plants that were big in the early 90s. I used to LOVE those commercials.

Chia seeds are cool for many reasons. Apparently the Aztecs were nuts about them, and they were often used as currency. Warriors and hunters would drink the chia gel instead of eating food because it would keep them full and energized. So its not just a seed, its a seed with lots of cool history!

They are FULL of fiber, two tablespoons has about 8 grams of fiber. They are great for people who need a lot of fiber, but have a hard time getting enough. Especially for older people, or those who are chronically ill/have cancer and need more fiber but have no appetite or have a hard time eating.
Chia seeds

They also are good for dieting, similar to spirulina, a small amount can keep you full for a long time, and give your body nutrients. They are also full of Omega Threes, the kind of good fat we want more of, and can help with keeping blood pressure and blood sugar under control. Also Dr. Oz loves them, and WHO doesn't love Dr. Oz?

Here are two sites with additional information, again its hard to find a lot of completely reliable information given there hasn't been a ton of formal studies.
Here is a blog that had some information: Blog on Chia seeds
Here is the nutrition facts: Nutrition Facts of Chia Seeds

Chia seeds are another tiny little miracle. They can be eaten raw, or made into a gel. Healthy boyfriend likes to drink them in water. When you put them in water, if you let them sit, they create a gel, that has a strange consistency. I had read that many vegans use chia get in place of butter or oil. I had never tried it, so I only used a small amount of chia gel in this recipe, unsure of how it would change the flavor. I found no flavor change, though these are only the third from scratch cookies Ive made, so a cookie expert could probably notice if there was a difference in flavor. Where is a cookie expert when you need one? If yall see cookie monster, send him my way.


water and chia seeds
Chia Gel
Chia Gel: To make 9 tablespoons or 1/2 cup and 1 tablespoon of chia gel, you put 9 tablespoons of water and 1 tablespoon of chia seeds in a bowl. Mix the seeds slightly, and then let rest for at least 20 minutes. It will create a gel, that looks grayish. It doesn't look appetizing, but doesn't taste bad. Try it, its mostly taste like water, with funny squishy things floating in it. The picture to the left is right when I put the seeds in. The picture to the right is the gel, after about 20 minutes.

As far as making cookies goes, a few things to remember. I looked at a several different cookie recipes, trying to learn about what makes a good cookie. One thing that was common is almost all the recipes was room temperature butter. Having your butter at room temperature makes it easy to mix, but also is how cookies turn out fluffy and light. So make sure when making cookies, you let your butter warm up to room temperature. You don't want it melted, just room temperature.

 I read in one of my Martha Stewart books(she is a bit intense, but has great information about WHY you do certain things in cooking) and she says you should never try to speed up making your butter room temperature ie microwave it. That can change the consistency and you dont want that when baking. If you forget to take your butter out of the fridge, you can slice it up very thin which will help it warm up faster. Or use a cheese grater and grate your butter, which will allow it to warm up fast as well.
Also make sure to take your eggs out and allow them to get to room temperature. So you do need to think ahead a bit when baking cookies, but not too much.

Next time I will attempt to use half butter and half chia gel, and see how it goes. Hope you enjoy!

This recipe is based on a few, but predominately Martha Stewarts Classic Chocolate Chip Cookie recipe.

Note: If you dont want to use the chia gel, just use 2 sticks of unsalted butter.


Chocolate Chip Cookies with Chia seeds


The Goods: Makes 30-40 cookies
3 cups all-purpose flour
1 1/2 teaspoons coarse salt
1 1/4 teaspoons baking soda
3/4 cup(1 1/2 sticks) of unsalted butter
1/4 cup(4 tablespoons) of chia gel(see note)
1 cup packed light brown sugar
1/2 cup granulated sugar
2 large eggs, room temperature
1 teaspoon pure vanilla extract
2 cups semi sweet chocolate chips
1/2 cup pecans or walnuts, toasted(optional)

The Deal:


1. Preheat the oven to 350 degrees. Butter two large cookie sheets or line with parchment paper.

2. Whisk flour, salt, and baking soda in a medium bowl.

3. Place butter, chia gel and both sugars in a large mixing bowl. Mash with wooden spoon until light and fluffy, about 4-6 minutes. You can also you use an electric mixer to speed up the mixing. Add eggs, one at a time beating throughly until blended. Stir in vanilla.

butter, chia gel, and sugars
mixing in eggs

4. Add your flour mixture in three additions, adding it slowly to fully mix the dry ingredients into the wet. Once mixed, add your chocolate chips and nuts if using.

5. Use an ice cream scoop to scoop dough and place on cookie sheet, leaving plenty of room between cookies.

6. Bake for 13-15 minutes, or until golden brown on edges and toothpick comes out clean. Rotate your cookie sheets half way through cooking to avoiding burning the bottoms of your cookies. Remove from pan and place on wire rack to cool.

Very important: Grab a hot cookie and enjoy your delicious accomplishment! Cookie five!

Sunday, February 27, 2011

Roasted Parmesan Asparagus

Steak, potatoes and greens. yum!
Well folks last night I cooked myself a MEAL. I often dont feel like cooking a big meal for myself, I like to save all the time and effort for other people.

But its SO important that we treat ourselves. Making a delicious meal for yourself, makes you feel special. And we ARE special, so lets make sure to treat ourselves as such.

Last night I made steak in a red wine butter sauce with mashed potatoes and roasted asparagus. The steak was slightly overcooked, I had never cooked steak before. It was still very delicious, but it was tougher than I wanted it.
The potatoes were supposed to be a smashed baked potato but I messed them up so just made mashed potatoes.

The asparagus was the only thing that turned out perfectly, which makes sense because I had made it before. The meal wasn't perfect, but it was tasty and I didn't let a few mistakes ruin my saturday night.

I am not posting the steak or potatoes because I still haven't perfected the recipes. And honestly it will be rare that I cook steak, so it may take some time. Get it rare steak, oh yeah.

Asparagus and salt
Roasted asparagus is one of the easiest ways to cook asparagus and its melt in your mouth good. I love asparagus in general, I could eat it every day.

Hopefully you have all had it, and know what it does in the bathroom. Yes, it does make your pee smell funny, but its worth it. Plus who is really smelling your pee, REALLY.

Always look for thin asparagus, its the best. Also look at the tips, and make sure they aren't browned or going bad.

This side is nice because it can go with so much and looks elegant.

Roasted Parmesan Asparagus
before they are baked
After they are baked and delicious


The Goods:
Roasted Asparagus:
1 pound of asparagus,
1/3 cup freshly grated parmesan
2-3 tablespoons good olive oil
sea salt
freshly ground pepper

The Deal:
1. Preheat the oven to 400 degrees.

2. Break of any tough ends of the asparagus. Place it on baking sheet and drizzle olive oil, then toss it and coat the asparagus. You don't wanted them drenched, just coated.

3. Spread the asparagus in a single layer on the baking sheet and sprinkle a generous amount of salt and pepper. Then sprinkle parmesan, lightly covering the pan.

4. Roast in the oven for 20-25 minutes or until tender but still crisp, the parmesan should be crispy but not burned.

Serve hot, and ENJOY!

Wednesday, February 23, 2011

Pesto, Olive, Onion and Mushroom Pizza or POOM Pizza

Is there anything better than Pizza? Lets be honest here, the answer is simply no. I could probably eat pizza every day for the rest of my life. Unfortunately I would also like to live beyond 40, and not be 500 pounds, so probably cant have an all pizza diet.

I have learned ways to make pizza healthier, and it can be a good way to get vegetables in those picky eaters. You can do so much with pizza, and it can be a great thing to have your kids help you make. Pizza is so versatile, its great for potlucks, sleepovers, pretty much anything you can imagine.

With this pizza I made my own crust, with LOTS of help from healthy boyfriend. He is the one that first got me started on making my own crust. He often used all whole wheat flour which I found to be to stiff. But he is a master of kneading the dough, and rolling it out. You do have to let your dough rise, though not as long as you might think. Making dough can be tricky, and may take a few times of trial and error to find the dough thats right for you. Some like it thicker, others prefer a nice thin crust, so you have to play around with it. Which is awesome, because who doesn't like playing with dough!

I would eventually like to make a mostly wheat crust, but the gluten content in wheat flour makes that difficult. Also I just love a good white flour pizza crust, I just do. Grrrrr.

I didn't make my own sauce, that will have to be next time. There are fairly decent jarred sauces out there, but of course homemade is always healthier because you know all the ingredients in it. That said, jarred sauce is a savior when when you only have an hour to put food on the table.

I listed the ingredients I put on my pizza, of course use what you have and know you like. Pizza can also be a great way to use vegetables you have leftover from other dishes. The toppings I used were just that, leftovers, from other dishes. The pesto was excellent as a topping, though I wouldn't make a batch just for pizza. Unless you wanted to use it as the sauce.

Note: When making the dough, if it starts getting too tough, let is rise for about 20 minutes, and then knead in a bit more water. If still tough, let it rise another 20 minutes and add more water.

Pesto, Olive, Onion and Mushroom Pizza AKA POOM Pizza


The Goods: Makes one 12 inch pizza, serves 3-4


The Parmesan Crust: makes one 12 inch crust
1/2 cup Wheat flour
1 1/2 cup White flour
1 packet active dry yeast(2 1/4 teaspoons)
2 tablespoons olive oil, plus more for brushing crust
1/2 teaspoon sugar
1 teaspoon of salt
2/3-1 cup of hot water(120-130 F)
1/4-1/2 cup parmesan, plus more for topping

Toppings:
1 cup button mushrooms, chopped
1/2 cup onions, diced or sliced
1 small can black olives
3-4 cups mozzarella, shredded
1 jar good pizza sauce(newmans marinara is good, as is Trader Joes pizza sauce)
1/2 cup homemade pesto(see toasted gnocci and spinach pesto post)

The Deal:
1. Combine 2/3 cup of warm water with the yeast. Let stand until it rises and is creamy, about 3-5 minutes.

2. In a separate bowl combine both flours, salt, and sugar. Add the yeast mix, and oil and combine with your hands until a ball forms. If its too dry, add a bit more water. If too wet add a bit more flour, both slowly. Once the ball is formed let stand covered for 20 minutes.

3. Preheat your oven to 450 degrees F.  Flour a large flat surface. Get a rolling pin, flour it, and then roll your dough out. Once rolled place on a pizza pan, before you top it. Its easier to move before you put toppings on. If there is over hang, roll excess dough slightly inward and pinch down, creating your outer crust.

4. Lightly brush your crust with olive oil. Sprinkle parmesan over the crust, rolling it in to help it adhere. Then sauce your pizza with a spoon, spreading the sauce evenly.

5. I order my toppings like this, first I sprinkle a light layer of mozzarella and parmesan. Then I put mushrooms, onions, olives and with a knife I place small dollops of pesto like the other toppings. I then put another thin layer of cheese.

6. Place pizza in oven for 15-20 minutes or until the crust in lightly browned and the cheese is bubbling. Let cool for 5 minutes before serving. Slice it up and enjoy your homemade pizza.

 Pictures are before pizza is baked.

Monday, February 21, 2011

Wheat Berries with Sweet Potatoes, Corn and Broccoli

So this is a ridiculously nutritious meal that healthy boyfriend discovered. Its just vegetables and a whole grain, which was pretty tasty. It also has beautiful colors and I think would appeal to those who arent crazy about vegetables.

This was my second attempt at cooking wheat berries, and I finally got it right. I wasn't nuts about the flavor, but I think that is just my taste buds aversion to whole grains. Healthy boyfriend LOVED them, so I bet many of you out there would as well. They were good, but I think I need to eat them a few more times before I start to really enjoy them. I feel the same indifference about brown rice, some day Ill crave whole grains like I do those unhealthy white carbs!

This is a great dish for athletes and the wheat berries with vegetables are nice and filling. Plus all the colors look beautiful together.

NOTE: I found that you MUST soak wheat berries in water overnight. If you are planning on cooking them that night, soak them right when you wake up, for at least 8 hours. These little suckers just wont cook unless you soak them, or buy them pre-cooked. So to make this dish, you MUST think ahead at least 8 hours, but they are so healthy its worth it.


Wheat Berries with Sweet Potatoes, Corn and Broccoli


The Goods: Serves 2-3
1 cup wheat berries, which have been soaked in water at least 8 hours
1 large onion, diced
1 small sweet potato, diced
1-2 cups broccoli, chopped
1 can of corn(or one ear)
1 cup vegetable broth
2-3 tablespoons olive oil
2 cloves garlic, minced
1/2 teaspoon cayenne pepper(more if you like spice)
sea salt and fresh ground pepper
1 teaspoon nutmeg

The Deal:
1. Drain your wheat berries, and place them in a pot of water with 2 cups of water. Bring to a boil, and then cover and reduce to low heat, should be at a simmer. Cook for 50-55 minutes, or until wheat berries are tender. Cooked wheat berries have a similar consistency to cooked corn.

2. Once the berries have been cooking for about 30 minutes, heat the oil in a large saute pan on medium heat. When the oil is hot, add onions and cook until translucent, about 2-3 minutes.

3. Then add garlic, salt and pepper and sweet potatoes, and cook another 2 minutes, or until garlic is aromatic. Add the vegetable broth, bring to a boil, then cover and reduce to a simmer. Cook until the potatoes are tender, 4-5 minutes.

4. Add corn, broccoli, cayenne, and nutmeg. Boil, cover and reduce to a simmer until broccoli is bright green and tender, 3-5 minutes. All the broth should be cooked, if not drain any remaining broth. Taste and add additional salt and pepper if desired.

5. Remove from heat and plate your wheat berries first, then a big scoop of your vegetables on top. Enjoy!

Based on a recipe from cooks.com

No THANKS white asparagus

At the grocery store I noticed the white asparagus was on sale. I had never had it, so I figured I should give it a try. I read about it, and it said it was similar in flavor to green asparagus, just a bit more subtle in flavor.

Unfortunately, I found it to be GROSS. I thought it was tough and lacked flavor. Even super healthy boyfriend did not enjoy it. We both tried to eat it, but gave up after one stalk.

I cooked it like I often cook asparagus, I marinaded it with worcestershire sauce, olive oil, salt and pepper and then baked it on a cookie sheet for 20 minutes. It was still tough, and did not soften up from further cooking.

Perhaps I will venture again into the white asparagus world, but for now Im sticking with the familiar, reliably delicious green asparagus.

If any of you have a great recipe, let me know.

This dish was a fail, good thing I can try again tomorrow!


Sunday, February 20, 2011

Crispy Gnocchi with Spinach Pesto

Saturday night and its time to get my COOKIN on. Been a while since I posted a new recipe, been busy as a bee, but I have a delicious recipe that I hope yall will love.
First I LOVE pesto. Fresh pesto is SO easy to make and is just incredible. I recently discovered spinach pesto which Im crazy about. Its better for you, but you dont have to sacrifice flavor. In fact traditional pestos are all basil, but I used mostly spinach and I think it tasted great and basil was still the predominate flavor.

I really enjoyed the crunch of the toasted gnocchi, while my boyfriend missed the softness of a traditional gnocchi. I would say try toasting it, if you desire a change, but the standard boiling of gnocchi is quicker and delicious.

Note: A quick way to freshly grate parmesan cheese. Cut it into pieces and place in a food processor. Pulse until grated, less than a minute:


Note: Toasting pine nuts is easy and much better than buying them already toasted. Simply place in a dry skillet over medium heat. Shake the skillet frequently to ensure even browning—the pine nuts are small  and will burn quickly if you don't watch them carefully. When the nuts are fragrant and browned, take the pan off the heat. Transfer the pine nuts to a plate to cool. 


Toasted Gnocchi with Spinach Pesto


The Goods: makes 1 cup of pesto, enough for 2 servings
1 package plain gnocchi
1 1/2 cups fresh spinach
1/2 cup basil
2-3 tablespoons olive oil
2 tablespoons pine nuts, toasted(see note)
2 small garlic cloves, chopped
1/3 cup freshly grated parmesan cheese(see note)
dash of freshly squeezed lemon juice
salt and pepper to taste


The Deal: 

1.This is an optional step. If you dont want your gnocchi toasted, just follow the instructions on the package to cook your gnocchi. If you want to toast it, heat a couple tablespoons of olive oil in a large skillet over medium-high heat. Add the gnocchi in a single layer and toss to coat with the oil. Let them cook until they are golden brown on the bottoms and then use a metal spatula to flip the gnocchi. Cook until they are golden all over. Salt, transfer to a plate and set aside.


2. While gnocchi is cooking, place pine nuts, garlic, basil, and spinach in food processor with fitted steel blade. Blend until a rough paste forms. Then begin to drizzle olive oil while continuing to blend ingredients. Blend until forms a smooth paste(picture at top of blog).


3. Place pesto in a bowl and stir in parmesan cheese, lemon juice and salt and pepper to taste. 


4. Once you gnocchi is ready, place in a bowl and scoop pesto on top. Now get ready to eat your greens and love every minute!


The toasted gnocchi is based on a recipe from 101 cookbooks website. The pesto is from a few different books, such as the 3 ingredient cookbook.

MARGARITAS!
Saturday Night just screams margaritas. Or a drink of some kind, I mean come on its SA. TUR. DAY. NIIIGGGHT!
I must give credit for this delicious drink to my cousin, Dan, who creates incredible cocktails, and this is pretty much the exact recipe he gave me.

First things first, frozen margaritas taste NOTHING like a real margarita. Making a margarita is simple, but fresh ingredients are KEY. Fresh lime juice instead of Roses bottled, homemade simple syrup instead of triple sec make a WORLD of difference. I have never liked salt on my margaritas so I didn't include it in the recipe. If you like salt, feel free to salt your rim, but know I never will!

I will say that its a strong drink, and the flavor is very intense. My boyfriend did not like the taste as much as I did, but I have always enjoyed margaritas, and he doesn't really. So make sure you like them before you squeeze those limes.


Fyi a typical shot glass is one ounce. Also after the recipe, I put how to make homemade sugar syrup, which is super easy and cheap.


Classic Margarita


The Goods: Makes 1 average martini glass serving

2 1/2 oz. Silver Tequila (Cuervo SILVER is what I used, but the better the tequila the better the cocktail)
1 1/2 oz. Fresh squeezed lime juice(it can be 2-6 limes depending on the size of the lime)
1-2 tablespoon Sugar(Simple) Syrup(or Agave Nectar) I used a bit more syrup, its up to you
4 dashes orange bitters


The Deal:
Put in a shaker with ice, strain them into the martini glass, and enjoy!

To make Sugar (or Simple) Syrup: This is something you can make and then keep in fridge for weeks.  To make one pint, dissolve 2 cups sugar and 1 cup water in a heavy pot over medium-high heat, whisking occasionally until it starts to simmer. Don't let it go long, else it will solidify like rock candy as it chills, or worse, if it continues to cook it will turn into caramel. Once simmering remove from heat, place in a jar and refrigerate until ready to use.

This is a picture of the sugar water about to boil. This is the recipe my cousin Dan sent me and it turned out great. Thanks again to my wonderful cousin!

Wednesday, February 16, 2011

Spirulina, so far so good.

Well its my third week of drinking my spirulina smoothies and I havent gotten sick since I started drinking them!
I havent had one every day, I would say on average its about 4-5 times a week. But there have been a few bugs going around and I have managed to avoid them all. Not sure if its the Spirulina or not, but Im loving this healthy body!
Have you tired Spirulina yet? We are smack dab in flu season, what are you waiting for?
Happy eating!

Monday, February 14, 2011

Egg Salad Sandwich

Its the incredible, edible, Egg Salad Sandwich! This weekend while looking in the fridge I noticed I had a lot of eggs and needed to use them.

They are very good for you in moderation. I wouldn't recommend eating them every day, unless you are very active. I always think of Gaston in "Beauty in the Beast" eating all those eggs and singing. If you look like Gaston, then you can eat lots of eggs. :) They are famous because they have lots of protein for their size.

Egg Salad was something I didn't like until I had a REALLY good one. Egg Salad and Tuna Salad are similar in the sense that they can be ruined very easily. So often they are weighed down with mayonnaise and whipped too smooth. A good egg salad should be nice and chunky and have enough mayo to hold it together, but mayo shouldn't be the predominate flavor.

The most important thing is making sure you dont OVER boil the egg. You have to boil the egg enough that the center sets, but you still want it creamy. Timing the cooking of the eggs is very important. Also you MUST toast your bread. If you dont, the egg salad makes the bread mushy, and its yuck-o.

There are many ingredients you can add to egg salad, I like chives and capers. Other options are celery, onion, dill, and mustard. When I have an egg salad thats particularly tasty I always try to get the recipe. Knowing the slight variations is great so you can mix it up for yourself and those you feed.


Splish, Splash, Eggs takin a ice bath:

Note: I read that the fresher the egg the harder it is to get the shell off. I happen to have some eggs from the store(white) and some from a local farm(brown). I did find the fresher local eggs where much harder to peel than the store bought kind. All that goes to say is older eggs are great for this dish!


Egg Salad Sandwich


The Goods: Makes 2 cups, or four sandwiches
6 Large Eggs
1/4 Mayo, add more or less depending on your preference
1/2 bunch of chives, chopped (about 1/4 cup)
1 teaspoon freshly squeezed lemon juice
1-2 tablespoons capers (optional)
Salt and pepper to taste
Whole Wheat Bread, toasted
Baby Spinach(optional)

The Deal:
1. Place the eggs in a pot and cover with cold water by a 1/2-inch or so. Bring to a gentle boil. Now remove from heat, cover, and let sit for exactly seven minutes. Have a big bowl of ice water ready and when the eggs are done cooking, gently place them in the ice bath for three minutes or so - long enough to stop the cooking.

2. Crack and peel each egg, and place in a medium mixing bowl. Add the mayonnaise, and a couple generous pinches of salt and pepper. Mash the eggs with a fork. Be careful here, you want the egg mixture to have some texture, think chunky. If you want to add a bit more mayo to moisten up the mixture a bit, add it slowly.

3. Add chives, capers, lemon juice, and more salt and pepper to taste. Stir just enough to mix. 

4. Place egg salad on toast with spinach(or lettuce) and enjoy!

This recipe is based on a few recipes, but predominately from the egg salad from 101 cookbooks website. Im becoming more and more obsessed with this website by the day.

Sunday, February 13, 2011

Types of Oil

One thing I have been trying to learn about are the many types of oil.

This picture is called, "Oils of My kitchen..."

Many of us only use Canola and Olive, but there is a whole world full of oils to play with. (Whether that be in the kitchen or in the bedroom is entirely up to you!)

I am no expert but have been trying to play(in the kitchen) with other types of oil besides olive and canola.
I will post some links below where you can read ALL about the many oils out there, but here are some key points:
Number one rule about oil: DONT LET IT SMOKE! If your oil smokes it ruins the taste, and actually takes away the healthy Omegas and good fats in your oil. When your oil smokes it can turn from a monounsaturated fat to a trans fat. Trans fats and polysaturated fats are the worst kinds of fats for you, so be very careful when cooking with oil. There are some oils that have higher smoking temperatures, such as grapeseed oil, and are better for sauteing, and others that have a lower smoking temperature that are better for baking or putting on salads.

There is a wide variety of oils available out there, but Olive and Canola are the most popular so are often the cheapest. Other oils like walnut and grape are great, but often more expensive because they are not as popular. I shop at Marshals and TJ Max and have found great deals in their cooking/homegoods department. Regardless, you will pay more for any oil that isn't canola or olive, so its good to always have your eyes open for a sale.
Grapeseed oil is great for frying because it has a high cooking temperature and has little flavor. IE unlike olive oil which adds taste to a dish, grapeseed does not, so if you need oil but not flavor, grapeseed oil is great to use.

Another thing to consider is the amount of Omega 3's versus Omega 6's in your oils. Both are important for your health, in moderation. From the articles Ive read, Americans in general get WAY too much Omega 6's and not enough Omega 3s. Both are fatty acids, but they do different things in your body. Because Omega 6's are more common in a typical american diet, many doctors recommend getting oils that have higher Omega 3s than Omega 6s.
Here is an article that goes into a lot of detail about Omega 3 versus Omega 6: Omega 3 versus 6


This is a link to a chart of all the oils, what they are made from, uses, types of fat, and smoking point. Its a great reference. OIL TYPES

This is another link that has similar information and also list the Omega 3 and Omega 6's in the different oils: Types of Oils

So next time your in need of oil, take some time in the grocery store and look around. Perhaps check out some sites about different types of oils and what would work best for the type of cooking you do.

Now go get your oil on!

Friday, February 11, 2011

Leftovers and Repeats

Hello people!
 Sorry its been a few days, but I am kinda on repeat this week. Spirulina Smoothies for breakfast and Spinach and Strawberry Salads for lunch. Dinner is leftovers or vegetable soup, so not much to blog about. This weekend I should have some time to plan yummy foods for next week, so next week should be filled with new dishes.
I will try my best to blog this weekend, all I really want is grilled cheese and tomato soup. Sometimes that hits the spot like no other.
Hope everyone is eating healthy out there!

Tuesday, February 8, 2011

Cheesy Zucchini and Couscous Cake

This is a neat and different way to cook couscous. I am trying to explore all the grains out there, and couscous is one of the easiest and fastest to cook. I enjoy couscous, though its not my favorite. The benefits are the quick cooking time, and the taste is very mild, so it can be used with a lot of different recipes.

You can use a variety of vegetables in this dish. I used zucchini because thats what I had on hand, but you could use leeks, caramelized onions, butternut squash, the varieties are endless. I love when I find recipes that are easy to tweak.
This time around I wasn't thrilled with the outcome. It was good, but not great and thats what Im looking for. I want to crave a dish, and I think with a few tweaks it could be much better. I am posting what I made, but I want to make this dish again to see it I can improve it. Next time I will try using a little bit of vegetable broth to give the couscous some flavor. Also I want to cook the vegetables in garlic to give them a bit more flavor as well. Feel free to try this dish and let me know what you would change! Fun Times!

What the couscous cake looks like before you flip it:

After you flip it, slightly overcooked, but not by much. You want it a bit crispy:


Cheesy Zucchini and Couscous Cake


The Goods: Serves 4

11 oz/1 1/3 cups of couscous

3-4 small zucchinis, sliced lengthwise and then thinly sliced

1 cup good cheddar cheese grated

1/2 cup freshly grated parmesan

3 tbsp olive oil

2 teaspoons sea salt, more to taste

1 teaspoon pepper, more to taste

The Deal:

1. Place couscous in large heatproof bowl and pour 2 cups boiling water. Cover and set aside for 15 minutes or until all the water has been absorbed.

2. Heat 1 tbsp of olive oil in 9 inch frying pan. Add zucchini and cook over medium heat until soft and lightly browned, about 5-8 minutes.

3. Remove zucchini with a slotted spoon and stir them into couscous. Add the grated cheddar cheese and salt and pepper and stir well. Heat the remaining oil in the pan and pour couscous mixure. Pat down firmly to form a cake and cook over low heat for 15 minutes, or until bottom is crisp and golden brown.

4. Remove pan from heat and slide out the cake onto a place, then invert it back into the pan and cook on other side. Cook for a further 5-8 minutes or until golden brown. Once ready remove from heat, slide onto cutting board and cut into wedges. Top with parmesan cheese, and additional salt and pepper if desired.

This recipe is based off a recipe I found in the Three Ingredient Cookbook by Jenny White.

Monday, February 7, 2011

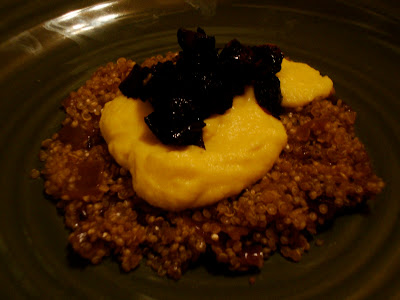
Garlic Quinoa with Pureed Cauliflower and Caramelized Onions

Well Folks, I was just in heaven. Not the actual place, but about as close as you can get on this earth. Healthy WONDERFUL boyfriend rented us a cabin in the mountains of NC. He surprised with a romantic weekend (inserts awwww noices here) and brought a bunch of vegetables to make, without any cookbooks or internet. I was a bit nervous I couldnt make anything without my resources, but I surprised myself and had a great time creating a new recipe!

He didnt have much of a plan for Saturday dinner, so I had to improvise. We made a meal that wasnt perfect, but was pretty good considering we used no recipes, just ingredients. Its one of the first recipes I have created almost entirely on my own, while of course using inspiration from other dishes.

Since we didnt have fresh vegetable broth, we used vegetable bullion, which was a bit too salty. Homemade broth is best, but in a pinch vegetable bullion can work magic. We also burned the onions, so added extra sugar which helped cover up the burned taste. Caramelized onions are easy, but we cut them too small. If you have never caramelized onions, its so delicious, but does take patience. This site has step by step pictures, which can help if you have never done it: Caramelize Onions

The quinoa went perfectly with the squash and the caramelized onions were a nice crispy addition. I really enjoyed the varying textures of this dish, I hope you do to!

Cauliflower before its been pureed:
Cauliflower after its been pureed. Or as I say, once its SUPER DELICIOUS:


Garlic Quinoa with Pureed Cauliflower and Caramelized Onions


The Goods: Serves 2
1 cup quinoa uncooked
2 cups vegetable broth,
2-3 cloves garlic, minced
2 small(or 1 big) yellow onions, sliced into thin strips
1 small red onion, diced
2-3 cups cauliflower, chopped
few pinches of brown sugar
2-3 tablespoons olive oil
3-4 tablespoons butter, or smart balance
1 tablespoon half and half
A few pinches of salt
A few pinches of pepper

The Deal:

1. Melt 2 tablespoons of butter and 1 tablespoon of olive oil in a medium pan on medium low heat. Add yellow onions, a pinch salt and pepper and saute in butter mixture, stirring occasionally. After 10 minutes sprinkle a couple pinches of brown sugar and put heat on low, stirring occasionally. It should take 30-40 minutes for these to caramelize. They will look very dark and taste sweet.

2. After the onions have been cooking for 20 minutes or so, in another medium pan saute the red onions and garlic, stirring often. While they are cooking bring a large pot of water to a boil.

3. Once the red onions have been cooking for 5 minutes, and begin to soften add the vegetable broth and quinoa into the red onion garlic mixture. Cover and cook for 15 minutes or until quinoa is cooked. Quinoa is ready when almost all the broth is absorbed and the quinoa has a white ring around each grain(picture below)

4. Add cauliflower to the boiling water and cook for 15 minutes, until tender and a fork can be easily inserted.

5. When the cauliflower is ready, drain it and put in blender. Add 1 tablespoon of butter, half and half and salt and pepper. Blend until smooth.

6. Place quinoa on a plate followed by the pureed cauliflower and finish with the caramelized onions.
Hope you enjoy as much as I did!

How quinoa looks when its ready, notice the white circles around the quinoa:

Friday, February 4, 2011

Thursday Pizza, Friday undecided

Howdy Yall,
     I didnt post a new yummy meal last night because I had PIZZA. PIZZA PIZZA! The Brew and view in Asheville has some of the best pizza in town. I went with healthy boyfriend and we shared a sesame crust pizza with portobello mushrooms, spinach and green olives. I was skeptical about the green olives, but they were SOOO good.
Never thought I would like vegetables on my pizza, but these days its all I want. Well that and pineapple. HOT DAMN do I love me some pineapple pizza.
Anyhoozle, will try to post a new recipe in the next day or two, I have lots of good recipes, its just a matter of MAKING them. I can feel my weekend laziness slowly creeping in. Ill do my best to fight it!
I have noticed I am feeling a lot better after a few days of my spirulina smoothies. I am much fuller, and my cold seems to getting better. I will probably keep making the smoothies next week, though maybe try some new fruit.
Hope yall are eating healthy out there!

Wednesday, February 2, 2011

Tropical Smoothie with Spirulina

Never thought I would say this, but this week Im eating algae. Thats right, Spirulina, a microalgae, is all the rage with the healthy people. Its incredibly healthy and you can intake it a few different ways. I had it first in a smoothie, and thought it was fine. It takes a little getting used too, but Ive grown to really like it.

Its like wheat grass in the way that a small amount packs a nutrient rich punch. I learned about it because its suppose to work miracles for the immune system. It also has high levels of beta carotene, B-12, and iron. Some people use it in dieting, because a small amount is very filling, and can help suppress appetite. So if you are someone who is trying to lose a lot of weight, this is a great product!

I have found that when I have it in smoothies, Im more full then when I have a regular smoothie. This smoothie easily keeps me full until lunch.
Its hard to find accurate information on Spirulina because its not well researched.
 This site, SPIRULINA!, has lots of information, though I cant be sure how much is accurate.
Some of the claims are pretty out there, but there just hasnt been a ton of research on this stuff.
I will keep yall posted on how I feel, I have been sick a lot and so I can test if this is helping my immune system. It would be lovely if I wasn't sick for at least a week.

As far as the taste, the best I can describe it, is if you ever really chew up your spinach, it taste similar to that. But its definitely a unique taste, spirulina-ey. I love thats its so good for me, that helps with the appreciation of the taste. Now that said, I do like using pineapple in smoothies with Spirulina because the pineapple has such a strong flavor it covers up some of the Spirulina flavor. Not all, but it helps if you are new to the stuff. And again, healthy boyfriend loves the taste, and has from the beginning, so you may too!

To buy it, you probably have to go to a whole foods or order it online. I got mine in the bulk section of our local hippie grocery store. I would shop around in price, I found it anywhere from $25-$50 a pound. So its not cheap, but what is these days. Anyway online is probably the cheapest.

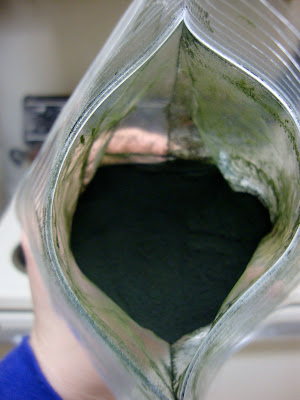
This is what is looks like, what a beautiful deep green:

This is better than the smoothie I posted last week. I did some tweaking and found you really dont need more than a cube of ice. Also if you use frozen banana, that can be used instead of ice. Now this smoothie is very healthy and good for you without spirulina, so if its too expensive or you dont like the taste you can omit it. I would really recommend giving it a try though, I really never thought I could like it, and I do.

Tropical Smoothie with Spirulina


The Goods(Ingredients): Serves 1
1 cube of ice
1/4-1/3 cup frozen pineapple
1/3 cup frozen mango
1/3 cup frozen peaches
Half of a banana(if frozen, omit ice)
1/3 cup Simply Nutritious Morning Blend
1 tablespoon Spirulina
Dash of Sea Salt
1-2 tablespoons yogurt(optional)

The Deal(Directions):
1. Place all ingredients in a blender and blend until smooth. Add more juice if the mix is not blending.

2. Dump what looks like green sludge in a cup, remember its super healthy for you, and bottoms up!