Showing posts with label Dessert. Show all posts

Wednesday, February 29, 2012

Just the cake for you.

Yep, it's as good as it looks.
So much for not being a cake person. Growing up I avoided cake at most birthday parties. Dry flavorless crumbs, almost always in the vanilla or chocolate variety never got me very excited. Sure I would lick the icing, but you were way more likely to find me sitting at the pizza table, than sitting by the cake. I've always preferred salty over sweet, which may also explain my salty personality :)

As I've gotten older I've realized that a good quality cake is one of the best things you can put in your mouth. You just have to use quality ingredients. No box mixes for me, they are bland and dry disasters. For my birthday a friend got me a wonderful book, called Cake Ladies that is all about delicious cakes and the stories and women who make them. The author owns a bake shop in town so it's neat to be reading from a local chef. She also makes a salted caramel cupcake that is like heaven in your mouth.

Currently I don't have a lot of occasions that warrant making an entire cake, so I mostly just look at the beautiful recipes in this book and dream. But every now and then I just break down and have to make a cake. Sure I wish I HAD to run a marathon or eat a big salad, but mostly I just want to bake cake. Strangely enough I don't even want to eat that much of it, just bake it. Baking is very calming and cathartic for me. Baking is much different from cooking, baking cannot be rushed and the ingredients must be exact.
In general I like fruit desserts, so when I saw this recipe for banana cake I knew I found something great. Basically it's punched up banana bread with a cream cheese frosting. If you wanted to make a cake, but wanted something a bit different than the traditional chocolate or white cake, this is a easy all purpose cake that sings with flavor. The orange zest really bumps up the flavor and is the perfect compliment to the banana flavor. I may just have to start using orange zest in my banana bread. I rushed the decorating part of the cake, but there are lots of options. Most of the ingredients you should have in your pantry and this is a great way to use up ripe bananas while also making the people around you very happy! Hope you enjoy!
Very easy to make, just prepare batter
Pour into cake pan. Bake and enjoy! 

Banana Cake

The Goods: 
3 very ripe bananas, mashed
3/4 cup granulated sugar
1/2 cup light brown sugar, lightly packed
1/2 cup vegetable oil
2 extra-large eggs, at room temperature
1/2 cup sour cream
1 teaspoon pure vanilla extract
Grated zest of 1 orange
2 cups all-purpose flour
1 teaspoon baking soda
1/2 teaspoon kosher salt
1/2 cup coarsely chopped walnuts

Cream Cheese Frosting (recipe below)
Walnuts halves, for decorating

The Deal: 
1. Preheat the oven to 350 degrees. Grease and flour a 9 x 2-inch round cake pan. In the bowl of the electric mixer fitted with a paddle attachment, mix the bananas, granulated sugar, and brown sugar on low speed until combined. With the mixer on still on low, add the oil, eggs, sour cream, vanilla, and orange zest. Mix until smooth.

2. In a separate bowl, sift together the flour, baking soda, and salt. With the mixer on low, add the dry ingredients and mix until just combined. Stir in the chopped walnuts. Pour the batter into the prepared baking pan and bake for 45 to 50 minutes, until a toothpick inserted in the center comes out clean. Cool in the pan for 15 minutes, turn out onto a cooling rack and cool completely. Spread the frosting thickly on the top of the cake and decorate with walnut halves.


Cream Cheese Frosting: For one 9-inch cake
6 ounces cream cheese, at room temperature
6 tablespoons unsalted butter, at room temperature
1 teaspoon pure vanilla extract
2 1/4 cups sifted confectioners sugar

Mix the cream cheese, butter, and vanilla in the bowl of an electric mixer fitted with a paddle attachment on low speed until just combined. Don't whip. Add the sugar and mix until smooth.
This cake has been Kirstin Approved. 

Monday, November 7, 2011

G is for Ginger Molasses cookie.


If I was scoring redeemable value for these tasty treats, it would probably be in negative numbers. I wish I could say they are good for you in some way, but they just AINT. I will attempt to make them next time with part chia gel, but since I'd never made these cookies before I wanted to know what they should taste like before experimenting. Cookie experiments is the kind of science I'm in to.
Perhaps if you have a big healthy salad and teach some blind kids to read you can indulge in one of these delightful suckers. I just wanted to make them so I did. So there. No good reason besides I like cooking cookies.
Everyone is different, but when it comes to cookies I'm a chewy gal all the way. It is a rare occasion I hope for a crunchy cookie, almost always longing for a soft bite that slowly dissolves in my mouth. These chewy spice filled rounds were perfect. Soft, full of ginger and molasses flavor with a nice subtle crunch from the sugar on top. They were easy to make, just took a bit of time. Actually I made one batch the first night and then one batch two nights later. The dough held up great, just make sure you seal it tightly. I think the pictures express enough, no need to ramble too much about how delicious sugar, butter, ginger and molasses are. They are FREAKIN cookie-tastic and I want some right now. These would be a great treat to bring to a holiday party ie not a good idea for a night alone watching repeats of the Vampire Diaries (That is not me, it is some other crazy person...). Hope you enjoy these as much as I did, make sure to share. I did. Mostly.
Step One butter and sugar
Sticky Dough, needs refrigeration

Cold Dough, ready to be balled up
Sugar! 
Ginger Molasses Cookies
Flat out taken from Orangette

If you can wait these puppies are twice as good the next day. Something magical happens if you let them rest a night. Trust me, the flavors develop so do your best to eat these the next day. 
The Goods: Makes about 22 cookies
2 1/4 cups unbleached all purpose flour
1 1/2 tsp baking soda
2 tsp cinnamon
1 1/2 tsp ground cloves
1 tsp salt
1/2 cup vegetable shortening, room temperature (try to buy non-trans fat brand like Spectrum)
6 Tbs unsalted butter, room temperature
1 1/2 cups light brown sugar
2 eggs
2 tsp fresh ginger, peeled and grated
1/3 cup molasses
1/2 cup granulated sugar (such as unrefined cane sugar)

The Deal: 
1. In a medium bowl combine the flour, baking soda, cinnamon, ground cloves, and salt and mix with a whisk to evenly blend. Set aside.

2. In a large mixing bowl with electric mixers, cream shortnening, butter, and brown sugar until smooth and pale in color. Add the eggs one at a time, mixing until incorporated and scraping down the sides of the bowl between each addition. Add the ginger and molasses, and mix to blend well. Scrape down the sides of the bowl again.

3. Using a rubber spatula, fold half of the flour mixture into the wet mixture. After the first half is incorporated, add the remaining flour and continue folding gently until all of the flour has been absorbed. Scrape down the sides of the bowl, cover it with plastic wrap and place in the fridge for at least two hours. You CANNOT skip this step, the dough will be way too sticky without chilling.

At this point the dough can hold for up to 4 days


4. Preheat the oven to 350 degrees Fahrenheit, and line a baking sheet with parchment paper or a silicone liner. Pour the granulated sugar into a pie pan or shallow bowl.

5. When dough is solid and cool enough to handle without horrible sticking, scoop it out of the bowl and roll it into balls a scant 2 inches in diameter. Toss each ball gently in the sugar, and then place them on the baking sheet (about 6-8 per sheet), leaving 3 inches between each ball. Bake cookies on the center rack of oven for 15-17 minutes, until golden brown and slightly puffed. Let cool on baking sheet for 15 minutes before transferring to a rack. Repeat with two more sheets.

Sunday, October 30, 2011

Criss Cross Apple Sauce

Yeah, I got sauce.

As I've mentioned, I'm on an apple binge. Who knows when the insanity will stop? I'm not sure yet, but I'll let you know. For now Applefest 11 continues in my kitchen, with no end in sight. The reason for making apple sauce was one of necessity. I had a whole crap ton (that's the scientific measurement) of apples that needed to get gone. I was in a lazy (read grumpy) mood so did not want to do anything to complicated or time consuming. I stumbled across this apple sauce recipe which looked simple and delicious; Sweet, the two things I was looking for.
Apples and Apples and Apples and Apples.
Now there are several different ways to make apple sauce, this is just one that looked appealing to me. I will as always try other recipes, given this one only lasts a few days in the fridge and I would prefer to find a recipe that lasts a few weeks. Other than that I loved the simple apple flavors and the chunky consistency. This is also an easy way to make a healthy dessert. You can also use apple sauce in recipes, I recently made a carrot cake (recipe coming soon) that uses apple sauce which was delicious. Anyway apples are freaking everywhere right now, so go get you some apples and sauce it up. 

Classic Apple Sauce
Adapted from Simply Recipes

Be sure to use good cooking apples such as Jona Gold, Mcintosh, Granny Smith, Fuji or Golden Delicious. The sugar measurements are just suggestions, use more or less depending on your preference. 
The Goods: 
3 to 4 pounds apples, peeled, cored and quartered
3 strips lemon peel-use a vegetable peeler to make strips
2 tablespoons freshly squeezed lemon juice
3 inches of cinnamon stick
1/4 cup brown sugar 
up to a 1/4 cup white sugar
1 cup of water
1/2 teaspoon salt

Serve with yogurt, ice cream, or a small drizzle of half and half. 

The Deal: 
1. Place all ingredients in a large pot. Cover and bring to a boil. Lower heat and simmer for 20-30 minutes or until apples are very soft. 
Throw everything in a pot
Simmer the crap out of it. 
2. Remove from heat and discard lemon peels and cinnamon stick.  Mash with a potato masher. Serve warm or refrigerated. This will only keep in the refrigerator in an air tight container for a few days.

You can also freeze it for up to one year, just defrost before using.

Thursday, October 27, 2011

Ginger Apple Cake

I love the red and green peels peaking through
I seem to be on an apple binge. I suppose in trying to cook seasonally I may go a little overboard sometimes. I will also admit, I'm a fruit-aholic. It's rare for me to find a fruit I don't like, and by like I mean eat in ridiculous portions. During strawberry season I believe I ate enough strawberries to be part one. So as fall approaches with its squash and root vegetables the fruit selection is fairly slim. Sure there are pears, but there aren't a ton of those around these parts. Then of course there are the incredibly non local bananas, mangos and my personal favorite pomegranates. Apples are the local fruit at the market, so I'm doing my best try as many different recipes as I can. Trying to figure out which type I like best  Jona Gold, Pink Lady, Stayman, Winesap, is a task I am happy to take on.

I love how earthy it looks. Or is that just me? 
When I saw this recipe on 101 Cookbooks, I knew I had to try it. A cake that has only half a cup of sugar, 1/4 cup of butter, whole wheat flour and no frosting? Might I even dare say a healthy cake? I do! I dare! This is about as healthy a cake you can make while still using standard ingredients. This cake really knocked my pants down (Not that hard to do given I'm such a food newbie. Or if you are healthy boyfriend....) It was moist and had a lovely apple fall flavor. The bits of apple chunks were a treat in my mouth, a juicy surprise surrounded by moist cake and subtle ginger flavor. If you are not a fan of ginger, you can just omit it, as it was not in the original recipe. Though you may want to ask yourself why you don't like ginger, what is WRONG with you?! Along with apples, I'm also on a ginger binge tossing it in any recipe I can. I think the ginger and apple pair beautifully together, but the cake will still be delicious without it. This adorable cake would be a great one to bring to a fall party, and I know kids love it too. The cinnamon and apple chunks make it sweet enough that it doesn't taste "healthy". The kids don't need to know it only has half a cup of sugar.
The recipe calls for only red apples, but I did not have enough red ones so I used one green apple. I liked the multi-colored touch, but use all the same type of apple if possible.
Ginger Apple Cake
Adapted from 101 Cookbooks

If you don't have whole wheat pastry flour, feel free to substitute all purpose flour. Make sure to leave the peels on the apples, it won't be nearly as pretty without that touch of color.
The Goods: Makes one cake
2 cups sweet crisp red apples, cut into 1/4 inch cubes (peels on)
2 1/2 cups whole wheat pastry flour
1 tablespoon baking powder
2 teaspoons cinnamon
2 teaspoons fresh ginger, grated
Dash Nutmeg (optional)
1/2 cup dark brown sugar, lump free
1/2 teaspoon fine grain salt
2 eggs
1 cup buttermilk
1/2 cup walnuts, lightly toasted* and roughly chopped (optional)
1/4 cup butter, melted and cooled a bit
3 tablespoons large grain sugar
1 lemon, juiced

The Deal:
1. Preheat oven to 400 F degrees, racks in the middle. Butter and flour one 9-inch square baking dish or tart pan. Place chopped apples in a bowl of water and lemon juice, set aside. Combine flour, baking powder, cinnamon, nutmeg, brown sugar, and salt in a large bowl. In a smaller bowl whisk together the eggs and buttermilk. Then whisk in butter and ginger. Pour the buttermilk mixture over the flour mixture and stir until barely combined-careful not to over mix. Drain the apples, then fold apples and half of the walnuts into the cake batter.
Making your batter
Folding in your drained apples and nuts
2. Spoon batter into the prepared pan, pushing it out toward the edges. Sprinkle with most of the large sugar and the remaining nuts. Bake for about 20-25 minutes or until the cake is just set and a touch golden on top. Serve warm or at room temperature.
Ready for the oven
*To toast walnuts, place in a skillet on medium heat. Heat until VERY lightly browned, about 5-10 minutes. They should smell toasted. Watch carefully, it's very easy to burn your nuts. (Insert nut joke of your choice here)

Sunday, October 9, 2011

Who you callin a Tart? That's Apple to you!

Not perfect, its country yall.
This dish began where all dishes should, at the farm. Healthy boyfriend and I spent rather blustery Saturday afternoon at Grandad's Farm, in Hendersonville, NC. First thing healthy boyfriend did was purchase a piping cup of cider, which made walking around the farm much more enjoyable.
First a trip To Grandad's Farm
The intention was to go apple picking, but we soon saw most of the apples had been picked. We found many that had fallen to the ground, and ended up picking through the giant wooden crates that held apples of different varieties. I never knew how many types of apples North Carolina had. I've been seriously missing out on some delicious apples. I ended up buying a peck, which in layman's terms is a whole shit-ton of apples for two people. It was 22 apples precisely, for only $8 bucks. SA-WEET.
On the hunt
Is there anything better than apple picking followed by a sweet flaky homemade tart? If only I'd had time for a romp in the hay........I joke (sorta).
So many apples have fallen
I heart clouds
It's my APPLE CHART! From Left: Cameo, Stayman, Wine Sap, Mutsu, and Jana Gold
Everyone should make this dessert. The simplicity of the ingredients really helps the apple shine through. The pastry crust is flaky and a perfect "plate" for the apples to be shown off on. Trying to find the perfect apple tart recipe was tricky, so I combined two of the best ones I read. I used the crust from Orangette Blog, and used Jaques Pepin's way of preparing the apples. Recently I've been reading a lot of his book, Jaques Pepin's Table. He is so french and adorable, and his recipes are simply stunning. I have no doubt this is not my last apple tart, and I'm eager to try a variation or two.

Clearly the tart did not come out perfect looking, but the taste was exceptional. This was a dish I honestly couldn't believe I made. It tasted like something I would buy at a fancy bakery. Sure it took some time, but nothing was terribly complicated and it was, INCREDIBLE. I can't believe I'm saying this, but I think I like this better than apple pie. You really taste apple, and the crust is a part of the dish, but doesn't take over as in some apple pies. I still have apples left, so I'm sure there will be more apples dishes to come.

I did not get a chance to make the whipped cream, so it's not pictured. I'm sure it is delicious, I've had whip cream on a foot and it tasted delicious. Ok, not really. Point is, whipped creme makes everything better. 


There is no better time to make this recipe. Apples are season. Happiness is in season. Go pick some apples, find some happiness and get tartin! (I know I know, not a word)

Country Apple Tart
I miss you already...
The Goods: Serves 6-8


Tart Dough:
1 1/2 cups unbleached all purpose flour
1 tbsp sugar
4 tbsp ice water
9 tablespoons cold unsalted butter, cut into cubes
3/4 tablespoon salt

Apple Filling:
4 large golden delicious apples (1 3/4 pound) I used Stayman and Mutsu
1 tablespoon honey
4ish tablespoons sugar
1/2 teaspoon ground cinnamon
1 tablespoon unsalted butter

Heavy Cream for whipped cream
Drizzle of honey

The Deal:
1. In a food processor combine flour, sugar and salt and pulse to blend. Add butter, and pulse until the mixture resembles coarse meal; there should be no pieces of butter bigger than large peas. With the motor running slowly add the water, just until the dough begins to come together, about 10 seconds. If your down doesn't come together, add water, one tablespoon at a time, until it does.
Dough that is ready to be molded
2. Place dough on a wooden board or clean counter top, pressing the dough until it forms a ball. Press into disc about 1 1/2 inches thick. Pinch cracks together with your fingers, and then tightly wrap the dough in plastic wrap. Press it once more, massaging out any cracks, using the plastic wrap to help you form it into a smooth disc. Refrigerate the wrapped dough for at least 2 hours.
Disc with cracks
Smooth Disc, labeled and ready to chill
At this point the dough can be refrigerated for up to 4 days or frozen for 1 month. Thaw in refrigerator overnight before using.

3. Prepare your apples: peel, halve and core your apples. Arrange them cut side down on a cutting board and slice crosswise into 1/4 inch slices. Allow dough to soften slightly at room temperature before rolling out.
I used a tablespoon to scoop out the cores.
4. Preheat oven to 375, being sure your oven rack is in the middle position. On a lightly floured surface, roll the dough into a rectangle measuring approximately 11 by 16 inches. Transfer dough to a cookie sheet.
Next time I'll smooth out my edges.
5. Arrange apples over the pastry in 5 rows, leaving a one inch border, overlapping them like solitaire cards. Mix cinnamon and sugar together in a small bowl. Drizzle honey over the tart, then sprinkle the sugar honey mixture evenly over the tart. Dot with one tablespoon of butter.
I only fit four rows
6. Fold the edges of the pastry over the apples to create the one inch border. Bake tart until the pastry is crisp and the apples are tender, about 35-45 minutes. Remove from heat and let cool on the pan.
It's a tart! It's a tart! 
7. Cut into 8-10 slices and serve luke warm or room temperature with honey sweetened fresh whip cream. Yum!
Do not eat this by yourself. Tarts are for SHARING. 

Friday, October 7, 2011

Did someone say pie? Crust baby!

When I die, bury me in a giant pie. That's my motto! That I just made up. Have any of yall have seen "Waitress"? If you are like me, at the end you thought more about all the mouth watering pies than the actual plot. Though Kerry Russel will always have a special place in my heart, given the college years I spent watching Felicity (even post hair cut). Nallion Fillion can do no wrong, and I'll bake him a pie any day, if you know what I'm saying...... I'm saying he is crazy hot.

Regardless everyone should have a solid pie crust recipe in their pocket, because homemade crusts are the best. No store bought variety will compare, and if they do it's likely they are full of chemicals, partially hydrogenated oils, or plain ole expensive. I understand the impulse for pre-made crusts, homemade crusts take a while. Lots of time you don't need to be in the kitchen, but you do need a good 2 + hours to get it done. It's WORTH your effort, trust me. I read a bunch of different recipes, and each one had roughly the same steps. It may seem overboard to chill the dough, roll it out, then chill again, but these steps are vital. Light and flakey crusts happen when the dough and butter are cold when they go in the oven. Skip steps at your own dry brittle crusts risk.

Since I was the only one in the kitchen, I did not get any decent pictures of how to make your pie crust edge fancy. Decorative Pie Crust Edges, has lots of different ideas for crusts, so click on the link to pick your edge. I used the simple fluted pinch edge, but will be trying more in the future. There is a braided edge that looks adorable!

Pie season is upon us. There is no better time to perfect your pie crust. Many pies to come, so stay tuned!

Single-Crust Pie Dough
Adapted from America's Best Test Kitchen
Before being baked
This recipe makes enough for one 9 inch pie crust. For two crusts simply the double recipe. Be sure to have cold butter, freezing it works best, and ice cold water. These are key for a light flakey crust. Do NOT over-mix your dough.
The Goods: 
1 1/4 cup unbleached all purpose flour
1/2 teaspoon salt
1 teaspoon sugar (increase to 1 tablespoon for sweet recipes)
8 tablespoons butter, cut into 1/4 inch pieces and chilled (in freezer if possible)
4-6 tablespoons ice water

The Deal: 
1. Process flour, sugar, and salt in a food processor until combined. Scatter butter over the top and continue to process until the mixture has the texture of coarse sand, about 10-15 seconds. Transfer to a bowl.

2. Sprinkle 4 tablespoons of ice water over the mixture. Stir and press the dough together, using a stiff rubber spatula, until the dough comes together. If the dough is still dry, stir in remaining water, one tablespoon at a time until it comes together. Form the dough into a 4 inch disk, wrap tightly in a plastic wrap, and refrigerate at least one hour.
Do not over mix the dough
Label EVERYTHING. Memories fail, sharpies are forever.
At this point the dough can be refrigerated for up to 2 days or frozen for 2 months. Thaw on countertop until malleable before rolling. 

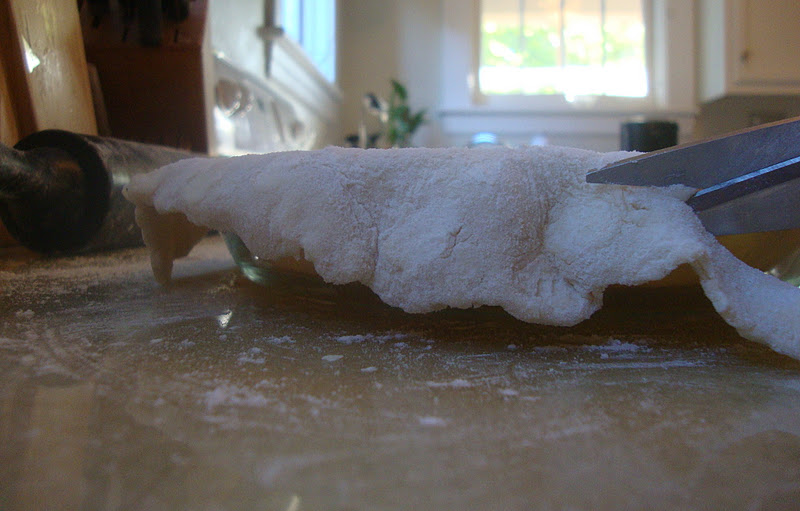
3. Let the chilled dough soften slightly at room temperature before rolling it into a 12-inch circle and fitting onto a pie plate. Trim extra dough with kitchen sheers so there is 1/2 inch edge hanging over the pie plate. Tuck the folded edge underneath itself to form a doubled rim that sits on the lip of the pie plate. Make edge of your choice (see decorative edges above). Freeze until firm, about 30 minutes.
Roll out crust, dots of butter are a good thing
Trim the edge, save left over dough in case you need to patch
pinching the dough
fluted edge :)
4. Be sure your oven rack is at the lower-middle position and heat oven to 375. Cover your pie with aluminum foil, being sure to fully cover the edge of the crust to prevent burning, and fill with pie weights (I used dried beans and rice, pennies work well). Bake until the pie dough looks dry and is light in color, about 25-30 minutes.

5. If you need a partially baked crust (also referred to as blind baking), transfer to a wire rack and remove pie weights and foil. For a fully baked crust, remove pie weights and foil and continue to bake until the crust is a deep golden brown, about 12 minutes longer.

A fully baked pie crust can be stored at room temperature wrapped tightly in foil for up to two days.

Sunday, September 25, 2011

Classic Cinnamon Buns

'Dem some good buns. 
Well I've been wanting to make these for quite some time. Below I will list the health benefits of these delicious buns. Ok there is....... now wait, they are loaded in........and lets not forget........ Dammit, they have no nutritional value at all. While chock full of happiness, these buns are severely lacking in any  vitamins or nutrients.
A friend of mine, Christine who is loves reading food blogs, showed me a similar recipe for cinnamon buns that just pushed me over the edge. Once I started reading recipes and saw how easy they were to make, I knew these sugary treats would be gracing my kitchen in no time.
Try to resist.....muahahahaha. ha.
The good news is they are so delicious you are guaranteed lots of friends and possibly even lovers. At least for the time it takes to eat them. The bad news is they should not become a weekly staple. I will definitely try to make these for every major holiday because they were just. so. damn. good. My mother has already been informed that we will be having them for breakfast Christmas morning.  I honestly couldn't believe I made them, they tasted better than almost any cinnamon bun I've ever had.
I am busy working on finding healthy seasonal recipes for the upcoming weeks, but an occasional treat is what lazy Sunday mornings are for.
These buns were surprisingly easy to make, and fairly inexpensive. Most kitchen pantries should have a lot of the basic ingredients, flour, sugar, butter, etc, and they only took about an hour. These are much better for you than those chemical filled junk traps you buy at the supermarket and the difference in taste is WORTH the extra time. I used organic sugar, unbleached flour, and almonds to try an add some redeeming qualities to this super indulgent treat, but again there is no way to get around they are mostly sugar, butter and flour.
Are you drooling yet? 
One each was more than enough for healthy boyfriend and I, in fact the overdose of sugar first thing in the morning left our bellies a bit grumpy. Next time I may have to serve them later in the day, my body is not used to that much sugar before noon. Not anymore anyway! That's growth baby!

If you are looking to impress, look no further. Colder weather is making its way towards us, bringing with it the instinct to snuggle with our loved ones and share a warm treat. Hope these sweet buns come to a kitchen near you soon!

Classic Cinnamon Buns
I know. I wish they were made of spinach too.
The Goods: Makes 8 large cinnamon roles

Filling:
3/4 cup packed dark brown sugar
1/4 cup granulated sugar
2 teaspoons cinnamon
1/8 teaspoon cloves
1/8 teaspoon salt
1 tablespoon unsalted butter, melted
1/2 cup of raisins (optional)
1/2 cup almond pieces (optional) Walnuts and Pecans would work great

Dough:
2 1/2 cups all purpose flour, plus extra for sprinkling counter
2 tablespoons sugar
1 1/4 teaspoon baking powder
1/2 teaspoon baking soda
1/2 teaspoon salt
1 1/4 cups buttermilk
6 tablespoons unsalted butter

Glaze:
3 tablespoons cream cheese, softened
3 tablespoons buttermilk
1 1/2 cups confectioners sugar

The Deal: 
1. Adjust an oven rack to the middle position and heat the oven to 425 degrees. Generously coat both a 9 inch nonstick round cake pan and a wire cooling rack.

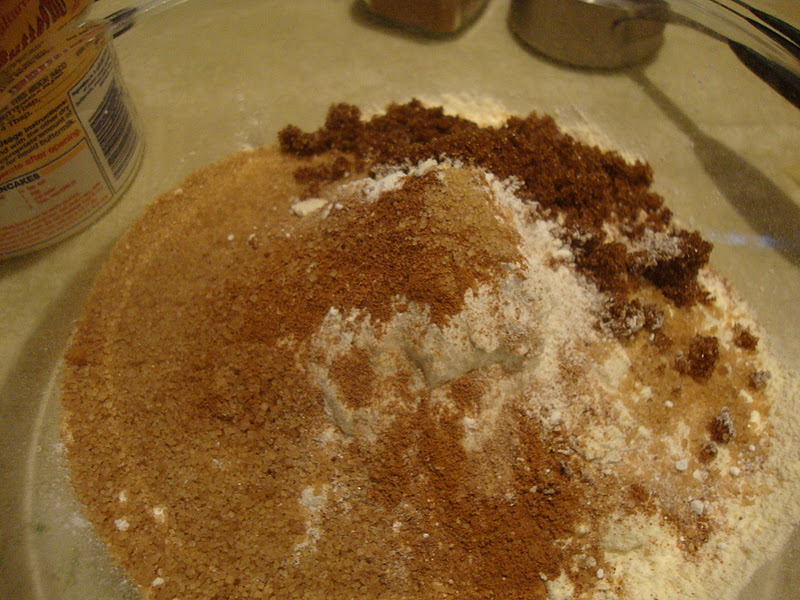
2. Make your filling: Combine brown sugar, granulated sugar, cinnamon, cloves, raisins and almonds if using, salt and then 1 tablespoon of melted butter together in a medium bowl until the mixture resembles wet sand.
Filling Mountain with a butter fall :)
3. For the dough: Whisk the flour, sugar, baking powder, baking soda, and salt together in a large bowl. Whisk the buttermilk and 2 tablespoons of melted butter together. Stir in the buttermilk mixture into the flour mixture with a wooden spoon until absorbed (the dough will look shaggy and its suppose too), about 30 seconds. Turn the dough onto the counter and knead until smooth, about 1 minute.

Shaggy Dough
4. Press the dough into a 9 by 12 inch rectangle using your hands. This is a bit bigger than a sheet of regular paper. Brush the the dough with 2 tablespoons of butter. Sprinkle the dough evenly with the filling, leaving a 1/2 inch border then press firmly into the dough. See pictures below.
I measured, super dork here
Spread filling, leaving a 1/2 inch border
5. Loosen dough with a bench scraper, or your hands. Starting at a long side, roll the dough, pressing lightly to form a tight log. Pinch the seam to seal. Slice the dough into 8 pieces and place in the prepared pan. Brush with remaining 2 tablespoons melted butter. Bake until the edges are golden brown, 20-25 minutes.
Roll dough firmly
Place 8 rolls in a pan and brush with butter
6. Use a knife to loosen the buns from the pan. Flip the buns onto the prepared wire rack, then turn upright an let cool for 5 minutes before glazing.
Baked Buns! Yums!
7. For the glaze: Set the buns over a sheet of newspaper. Whisk cream cheese and buttermilk together in a large bowl until thick and smooth. Slowly stir in confectioners sugar over mixture until smooth. Spoon glaze over warm buns. Serve warm.
Place cooling rack on newspaper, for easy clean up :)
These are good next day, but not AS good as hot out the oven.
One bite just isn't enough