Sunday, August 21, 2011

Fried Green Maters with Basil, Goat Cheese, and Caramelized Onions

It is, in fact, easy being a green tomato
Seasonal food is currently my greatest inspiration in the kitchen. Often I feel horribly overwhelmed when  trying to teach myself to cook. With each day I feel more confidant in the kitchen and at the same time completely clueless given the oceans of knowledge that exist about the culinary arts. One day at a time feels too slow sometimes DAMMIT!
Farmers market provide me such joy, that I know buying what is in season must be my guide for now. Time and effort are the only two things that can really improve my skill and knowledge base in the kitchen, so why not cook with the freshest ingredients available. Triple bonus that fresh food also means local and good for the environment. There is no reason to bite off more than I can chew, pun intented, by getting myself worked up over all the things I have yet to learn.

Tomatoes are spilling over tables at the farmer's market right now. Given I don't like eating them, I am forcing myself to find recipes that include the lovely fruit/vegetable. More importantly I'm a southern girl and think its required by law to know how to make a good fried green tomato.

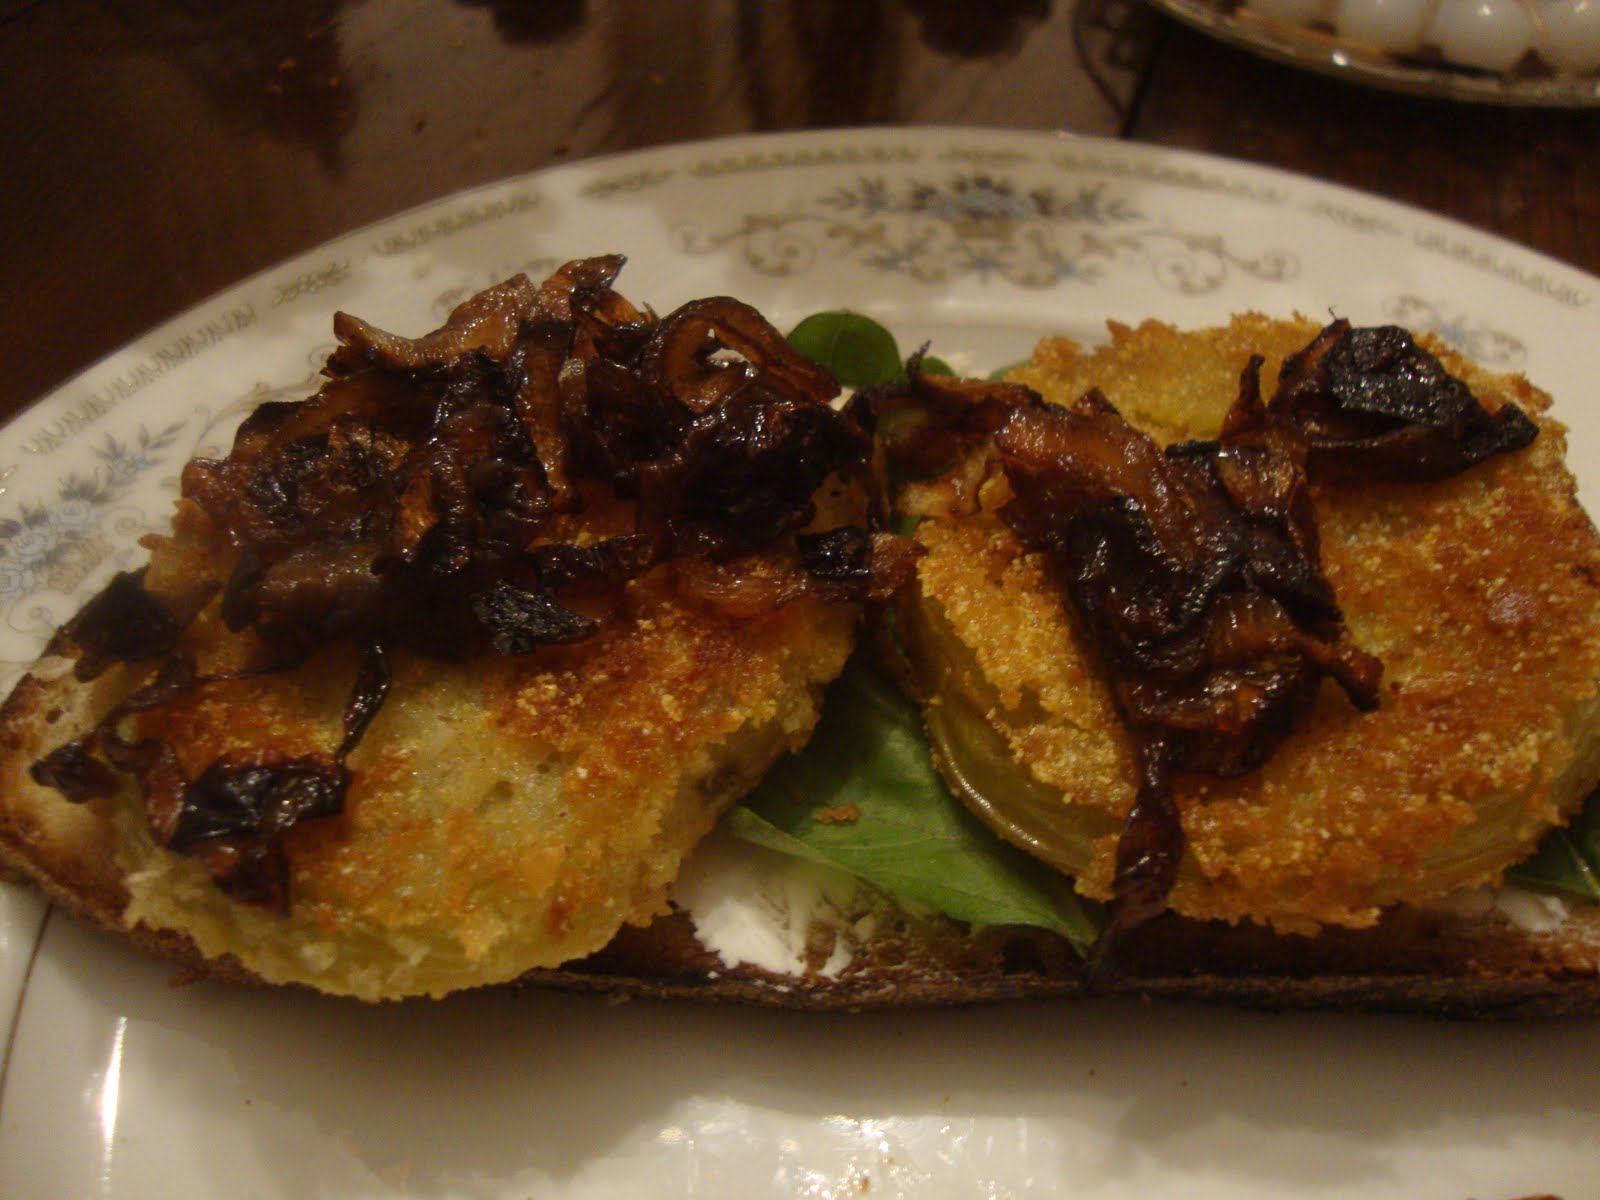
No, its even better than it looks. Even BETTER. 
I will try these again, tinkering with the coating a bit, but I really liked the mix of cornmeal and panko breadcrumbs. I was afraid only breadcrumbs would be to bready, but only cornmeal wouldn't give me the hearty crunch I was after. Combining the two was perfect, though I'll always look for a new way of breading.

The goat cheese idea came from a fantastic sandwich at one of my favorite local restaurants, Sunny Point. They serve a goat cheese, fried green tomato and bacon sandwich that is deadly. Basil is also common when serving green maters as an appetizer, so I took bits and pieces of dishes I like and combined them. The onions just happened to be occupying space in the kitchen so I decided to caramelize them. What a wonderful random accident that turned out to be.

Caramelizing onions is easy, just a bit time consuming. If you have never done it, check out this website that goes into a lot of details and has some nice tips: Caramelizing Onions Again, its not hard, but can be easy to mess up. Once you've done it a few times, it's easy to become a go to for a simple way to jazz up any dish. Bummer cooking onions down that much strips them of almost all their nutritional value. But sometimes flavor wins out, and caramelized onions will make grown men weep with joy. And not just because they were chopping them.


You can always just fry green tomatoes and serve with an aioli or on a bed of cheese grits. Caramelizing the onions took the most time, breading and frying the tomatoes, probably only about 15 minutes. Make sure you use firm green tomatoes, so they don't fall apart when fried.


Fried Green Maters with Basil, Goat Cheese, and Caramelized Onions


The Goods: Serves 2-3 as main dish
Fried Green Tomatoes: 
3 medium, firm green tomatoes
1 cup all purpose flour
1/2 cup panko crumbs (or other fine bread crumbs)
1/2 cup cornmeal
1 egg
1/2 cup milk

Onions and Sandwich:
2 large onions, cut in half and sliced 1/4 inch
1 tablespoonish brown sugar
2-3 tablespoons olive oil

6 ounces goat cheese, softened
6 slices of whole wheat bakery bread, sliced 1/2 inch thick
1/2 cup fresh basil
1/4 cup grapeseed oil(or other flavorless oil), for frying
Salt and Pepper

The Deal: 
1. Heat olive oil on medium high heat in a medium non-stick skillet until oil is shimmering. Add onions and stir to coat. Spread onions evenly and saute, stirring occasionally for about 10 minutes, or until they are browning. Watch carefully to prevent them from burning. Add brown sugar, a pinch of salt, and reduce heat to medium low. They will take 30-40 minutes to caramelize, stir occasionally and reduce heat if they begin to burn.

2. While your onions are cooking, prep your tomatoes. Slice each tomato into 1/2 inch slices. Sprinkle with salt and place on a plate with a paper towel (or dish towel) and cover with another paper towel. Let sit for at least 10 minutes or up to 30.

3. Next set up your breading station. Place the flour and about a teaspoon of salt and pepper in shallow bowl and mix. Next beat the egg and milk in another bowl. Lastly combine the cornmeal and breadcrumbs in bowl.
Time to bread! 

4. Once your onions are done, remove from heat. Dip each tomato slice in the flour mixture, then egg mixture, followed by the breadcrumb mixture. Make sure you evenly coat the tomato in each mixture.
Place on a plate.

5. At medium heat warm grapeseed oil in a large saute pan. Wait until the oil is close to smoking, then add 3-4 tomatoes, being sure not to crowd the pan. Fry for 3-5 minutes on each side, or until browned. Set fried tomatoes on a plate with a paper towel and repeat with remaining tomatoes.

5. Toast the bread in the broiler for 2-3 minutes, until warmed. Assemble your sandwich: Place a good amount of goat cheese in even layer on each slice of bread. Then place 4-5 basil leaves on the goat cheese, followed by 2 tomatoes. Finish with around a tablespoon of onions. Adjust portions to what kind of bread you have, etc.
Serve immediately!

Tuesday, August 16, 2011

Peach Bruschetta

Who could resist these adorable beauties?
Some of the more outstanding dishes are because something went wrong. Accidents in the kitchen can mean all sorts of things, from a dish being completely ruined to a dish being completely transformed.
Or in my case trying to avoid throwing out food can add a new dimension to an already loved dip.
Yum Yum YUM!
My parents came up for the day and I wanted to have a light refreshing snack waiting for them when they arrived. That morning I woke up early to get prime pickings at the farmers market and was wooed by some cherry tomatoes. As I've hinted (and bluntly stated) tomatoes are not my favorite, but I saw these cute multi-colored cherry tomatoes and just had to have them. For tomatoes, they are pretty freaking tasty. I was also riding a disappointment wave because there were no green tomatoes so my friend green tomato plan went out the window. I didn't think through cutting and seeding them, and how little tomato flesh I would actually have. This ended up being peachy heavy by accident, a lovely accident!

This recipe is not exact, as it was very thrown together with what I had. If you have fruit that is about to spoil, throw it in a bowl and see what comes out. This was intended to be a plain bruschetta, but thank goodness I added the peaches. It was an explosion of clean fresh summer flavors in my mouth and everyone who tried it agreed. For such a simple recipe, it was outrageously good.

Be careful about adding the balsamic, oil, and lemon juice. It's easy to let these elements over power the dish. A little bit goes a long way. Each of these elements are there to enhance the dish, and bring out the bright, clean flavors of the fruit. You do not want to taste any of these ingredients, so just add a splash. As with many fruit/vegi dishes each time you make it may be different so always taste as you go.

This is best fresh, and doesn't keep well. Again all the measurements are a guesstimate, so have fun experimenting!

Peach Bruschetta 

The Goods: Makes about 2 cups
2-3 medium peaches, peeled and diced
15 cherry tomatoes, seeded and diced
2-3 tablespoons basil leaves, chiffonade
Dash of freshly squeezed lemon juice
Dash of balsamic vinegar
Dash of olive oil
Salt and pepper to taste

The Deal: 
Place all ingredients in a bowl and combine. Add more balsamic, lemon juice, salt or pepper if needed. Serve immediately with crackers or toasted bread lightly brushed with olive oil.

Wednesday, August 10, 2011

Sundried Tomato Pesto with Pan Fried Ravioli

Fried Pasta with Pesto and Roasted Asparagus. 
Fancy dinners get me so excited. Since I've started down this road of food enlightenment, my favorite thing to do for a special occasion is to cook something delicious that hopefully will fill that person(or persons) with a since of warmth and excitement. We all have are individual ways of showing our love, and for me cooking a good meal is about as loving as you can get (feel free to insert your own dirty reference here).

Healthy (and super wonderful) boyfriend had a birthday this weekend and I wanted to make something decadent, but didn't have a lot of time to plan or execute the meal. So of course I looked at my Simple Vegetarian Pleasures cookbook (aka my new book boyfriend) and found this simple and tasty dish that only took about an hour total. We were both feeling under the weather, so I did not want to spend all day in the kitchen when I knew we both did not have our normal appetites. In fact, healthy boyfriend ended up loving the meal, but being able to eat a bunch because of his sick tummy. That's what leftovers are for :)

I loved the taste, though I would like to tinker with it a bit next time. It was good, but I thought it lacked something I still can't put my finger on. Certainly use the pesto sparingly as a teaspoon goes a LONG way. The raviolis were silly yummy, and something Ill keep in my pocket for a quick appetizer. No shock that frying pasta makes it taste better, you can fry a sock and make it taste good(This is in no way an endorsement to eat socks). Oil and breadcrumbs, hard to go wrong with. I may try to add the pine nuts first next time, or even use another kind of herb. Panko breadcrumbs are the way to go, or use fresh made if you can. Normal store bough breadcrumbs work alright, but are so filled with chemicals and junk I avoid them.

Because I used loose sun dried tomatoes, they needed to steam first to soften them. If you use sun dried tomatoes in oil, just drain them and blend, no need to steam. Any reason to use my steamer makes me happy.

Finding quality ravioli without breaking the bank can be tricky. All the national brands I've tried are terrible, but who wants to spend $7-10 on a package of ravioli? Queens and movie stars, that's who, but I don't think either read my blog.
Mushroom and Spinach ravioli would both work great with this recipe, as would traditional cheese. Mine were from a whole foods, the 365 mushroom ravioli, which were fine, but nothing to write home about. Time did not permit me to go to the farmers market to get some local made ravioli, but in the future that is what I would prefer. Look around your neighborhoods and try to find a local homemade pasta, it makes a big difference in the taste.

Such a flexible dish, try it and see how easy it is!

Sun dried Tomato Pesto with Pan Fried Ravioli


The Goods: Serves 4-6 as appetizer, 2-3 as main course
The Pesto: 
1 1/2 ounces(about 10) loose sun dried tomatoes

1/4 cup olive oil

2 small garlic cloves, minced

1 tablespoon freshly squeezed lemon juice

2 tablespoons pine nuts

1/2 cup chopped fresh parsley

1 tablespoon grated Parmesan cheese

Salt and Pepper to taste

The Ravioli:
1/3 cupish milk 

5 tablespoonish dry (panko) bread crumbs

20 delicious ravioli, defrosted if frozen (pick some good ones!)

Oil for frying, olive or grape work great

The Deal: 
1. To make the pesto, steam* the tomatoes until soft, around 10 minutes. Remove and let cool.

2. Place tomatoes, oil, garlic and lemon juice in a food processor and puree until smooth. Add pine nuts, parsley, salt, and pepper and pulse until the mixture is almost smooth but has tiny pieces of these last ingredients. Scrape into a small bowl and then stir in the Parmesan cheese. Add salt and pepper if needed.
Maters, garlic, lemon juice and oil
Puree #1
Adding the rest of the ingredients
3. Ravioli time! Put the milk in a small bowl and the breadcrumbs on a small plate on the counter. Dip each ravioli in the milk, then coat both sides with breadcrumbs, just don't cover them completely. Place on a platter.
Dipping in milk
Lightly breading, no need to coat completely
Ready to FRY!
4. Cover the bottom of a large skillet with a little oil. Heat over medium heat until hot but not smoking.  Fry the ravioli in one layer (you may have to do this in two batches) until golden brown on both sides. Use tongs to flip them over as needed. Place on a paper towel covered plate to drain off oil.
Serve on a platter with about a teaspoon of tomato pesto on top of each of them. Garnish with a sprinkle of freshly grated Parmesan.

*Fairly certain everyone knows how to steam, but just in case. To steam tomatoes, place about an inch of water in a medium pot with a vegetable steamer, cover and heat on high until boiling. Once boiling, place tomatoes in the steamer, place lid on top and steam until soft, around 10 minutes.

Monday, August 8, 2011

Eggplant Caviar

Chips and Dip, who doesn't love that?
And Im BAAAACCK! Its been oh too long since my last post but not to fear. Your mostly vegetarian, mostly healthy blogger is back with a bunch of new yummy recipes. (Insert personal sigh of relief here)

The last two months have been exhausting, blissful, confusing, exciting, and mostly ridiculous. I am finally in a new home(three cheers to that!) that has a kitchen so beautiful I would live in it, if that wasn't impractical on every level.

I also was on vacation and abandoned my healthy eating routine for convenient junk food eating. I now know that its unlikely I will ever eat uber-unhealthy again in my life. Sure I have more pizza than I should, and I can always eat less meat, but eating mostly junk food for even a few days made my tummy and body feel awful. Too much salt, sugar, and processed crap made me feel tired, grumpy, and constantly nauseous. Though it can be fun to indulge in chips, soda, and magic shell(Damn you delicious magic shell) the effect it has on my body is not worth it. Vacations are for being ridiculous, and eating to the extreme, but I must say Im happy to be back in the land of brown rice and steamed broccoli. I also missed cooking and blogging and now I finally have a nice clean kitchen to cook in!

So Im jumping back in a with a healthy dip that can served as an appetizer, spread on a sandwich, or even a base for a pizza. Not sure why its called caviar, its from The old Quick Vegetarian Pleasures book, and apparently is Russian in origin. This book doesn't seem to have a bad recipe in it, I'm telling yall, Jeanne Lemlin is WHERE ITS AT. These books are over 20 years old, but the recipes are spot on tasty. Also for the most part affordable, which any gal/guy on a budget can appreciate.

The ingredient list drew me to this dish because it is only vegetables. Also eggplant is a vegetarians best friend, and I want to have as many ways to cook it as possible. Green bell peppers are in the mix as well, and since I seem to hate their taste, Im trying to use them in more dishes to build up a tolerance for them. I know that sometimes you just don't like how a food tastes, but I never thought I would like ANY vegetables, and now I love so many. You are next bell peppers, watch out!

Vegetable delicious-ness
I recommend serving this with crackers, assorted vegetables such as carrots, cucumbers, celery, or homemade pita chips. To make your own pita chips just cut your round pita into triangles, bake on a cookie sheet it for about 5 minutes at 425 degrees and BOOM, delicious homemade pita chips for your dining pleasure. FYI Pita bread is about as cheap as it gets, and so versatile. I try to keep it around for quick chips, making pita pizzas or sandwiches. Plus it comes in whole wheat!

Looking for a way to jazz up your normally bland vegetable sandwich? Take some good hearty wheat bread, fresh spinach, sprouts, carrots, tomato, slap the eggplant spread on each slice of bread and you have a great lunch.

Get creative, this is healthy, delicious, and taste perfect at room temperature. Enjoy!

Eggplant Caviar 

The Goods: Serves 6-8 as an appetizer, about 3 cups

1/4 cup olive oil

1 medium yellow onion, finely diced

1 16 ounce can plum tomatoes, drained well and finely diced

1 green bell pepper, cored, and finely diced

1 medium eggplant, peeled and finely diced

2 tablespoons freshly squeezed lemon juice

1/2 teaspoon sugar

1/2 teaspoon sea salt

1/8 teaspoon freshly ground pepper, more to taste

The Deal: 
1. Heat oil in a large saute pan over medium high heat. Add onions and saute until soft about 5 minutes. Add tomatoes and saute another 5 minutes, stirring often.

2. Reduce heat to medium and stir in remaining ingredients, cover, and cook for about 20 minutes, until the eggplant is very tender. Stir periodically.
Vegetables just added, so pretty :)
3. Remove lid and cook until all the juices have evaporated, about 5 minutes.
Ready to be blended
4. Place half of the eggplant mixture in a food processor(or blender) and puree until smooth. Stir back into the remaining mixture. Remove from heat and place in a serving bowl. Serve at room temperature.