Thursday, December 22, 2011

Easiest Gift Ever


Making gifts is a wondeful idea. Though sometimes after hours and hours of prepping, cooking, resting dough, and actually looking at cost, making gifts becomes WAY more expensive and time consuming then just buying one. Now I'm all about the spirit of giving something you put your heart and hands into, but not when it comes at the expense of your sanity. 
Thats where chocolate bark comes in. It's everything I want in a gift, it looks nice and expensive, while being cheap and easy. Now this is one of a billion variations, though I really loved the combination of flavors. I would be careful using ginger because while I could eat ginger all the times, not everyone feels the same way. Ginger is a strong flavor, and even in this decadent dish, the ginger is one of the stronger flavors, so be sure the person you are gifting this too likes ginger. You could sub it for another dried fruit or nut, or just omit it all together.
The only bad thing about this stuff is how addictive it is. It will behoove you to make it for someone else, avoiding any all night chocolate binges that have been known to happen. Not to me of course, but other people. Oh. And me. I know all our big holidays are behind us now, but this is a perfect New Years treat to bring to a festive partay. Enjoy!
Draw a rectangle
Melt that Choc-co-lat. mmmmmmm.
Pour in rectangle, doing a better job than I did. 
Sprinkle on delicious goodies

French Chocolate Bark
Based On Barefoot Contessa's French Chocolate Bark

The Goods: Makes 20-24 pieces
8 ounces good semi-sweet chocolate, finely chopped
8 ounces good bittersweet chocolate, finely chopped
1 cup roasted almonds, toasted and roughly chopped
1/2 cup golden raisins
1/2 cup dried apricots, 1/2 inch diced
1/2 cup dried cherries
1/4 cup candied ginger, 1/2 inch diced
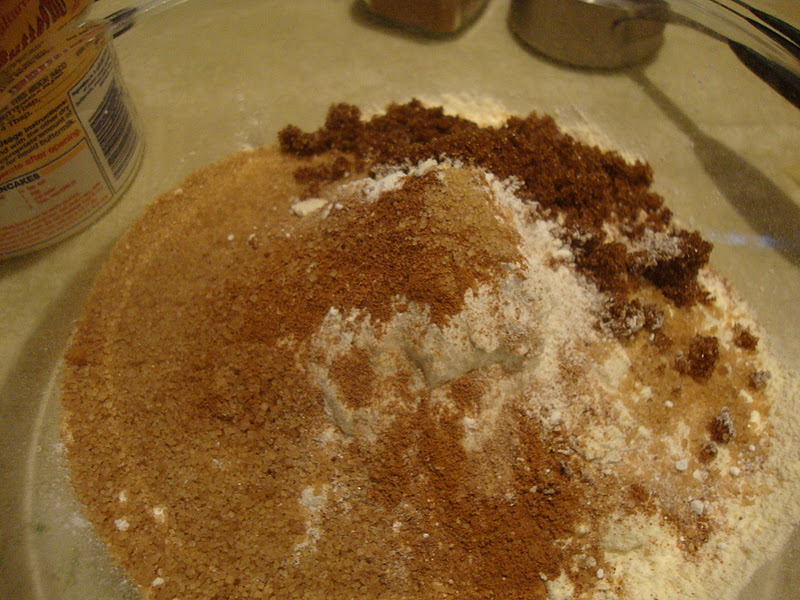
The Deal: 
1. Place a piece of parchment paper on a cookie sheet and draw a 9-inch by 10 inch rectangle on the paper. Flip the paper over.

2. Place all the semi-sweet chocolate and half of the bittersweet chocolate in a heatproof bowl. Microwave for 30 seconds, stir and continue to microwave until all the chocolate has JUST melted, checking every 20 seconds, stirring with each check. Once fully melted, immediately add the rest of the bittersweet chocolate and stir vigorously until the chocolate is completely smooth.

3. Pour the chocolate mixture onto the draw rectangle, doing your best to distribute the chocolate evenly. Use a spatula to get all the chocolate out of the bowl and evenly spread it on the paper. Then top the chocolate in this order: ginger, almonds, cherries, apricots, and raisins. Set aside until firm, about 2 hours. Once firm, but into squares and serve at room temperature.
This will keep for about a week served in a air tight container.


It's Chili Yall.


With the weather dropping, sorta depending where you live, I think most of us want something warm and simple to come home to. And if you are like me, with all this holiday insanity, you need something that doesn't take a lot of time. Soups and Chili are the perfect fix. With only a little chopping you throw everything into a pot and cook it until the flavors meld, which gives you just enough time to open the wine and snuggle up to a book. 

This recipe is a meld of a few different vegetarian chili dishes I found. You can add all sort of other vegetables such as zucchini, sweet potatoes, peppers, etc but I was looking for something with almost no chopping needed. My kitchen had been usurped by my roommate all day so it was 9pm before I could start dinner. Given the circumstance, I needed dinner to be quick so did not add a ton of vegetables. As I said, there a million variations, but this is a great basic chili to add on as you see fit. The flavors are rich and it's healthy to boot! You could also play with beans, using pinto or white northern beans, along with the classic black bean for a variation. As I said chili is fairly versatile, but knowing what spices to use helps your chili stand out.
Most of us will be eating fairly gourmet this weekend, but next week I urge you to make this simple, healthy chili. Make it on Monday and have lunch for the rest of the week :)

Vegetarian Chili
Based on "Vegetarian Pleasures" Black Bean Chili

The Goods: Makes a big ole pot of Chili, serves 4-6
2 tablespoons grapeseed oil 
2 medium onions, diced
6 large cloves of garlic, minced
1 1/2 pounds portobello mushrooms, stemmed, wiped clean and cubed
2 cups fresh corn kernels (frozen is fine) 
1 (28 oz) can diced tomatoes in their juices
3 cups cooked black beans, drained and rinsed
2 cups vegetable stock or water
2 tablespoons chili powder
1 teaspoon dried oregano
1 tablespoon soy sauce
1 tablespoon ground cumin
3 tablespoons tomato paste
1 teaspoon ground ginger
1 teaspoon cinnamon
1 1/2 teaspoons salt
1/4 teaspoon cayenne (more if you want a spicy chili)

Suggested toppings: 
Sour cream and chives
Sliced Avocado
Shredded Cheddar
Fresh Cilantro

The Deal: 
1. Heat oil on medium high heat in a large stock pot. Add onions and garlic, cooking until soft, about 3 minutes. Add corn and mushrooms and cook until soft and browned around the edges, about 6 minutes, stirring occasionally. Add chili powder, soy sauce, cumin, oregano, ginger, cinnamon, salt and cayenne, stirring constantly and cooking until fragrant about 1 minute. Add tomatoes, tomato paste, black beans, and vegetable stock and mix well while bringing to a boil. Reduce heat to medium low, keeping a good simmer until thickened, but not pasty, about 30 minutes. Taste and add seasonings if desired. 

Serve warm over brown rice. This also reheats beautifully, add a bit of water if too thick when reheating in a pot. 

Wednesday, November 30, 2011

Yo couscous! Have you gotten bigger?

Oh yeah. Now you can see how cute the pearl couscous is. 
First I'm sorry I've been ever so neglectful of my blog. Traveling, illness, general holiday distraction has kept me mighty busy, but I'm back with a bunch of delicious recipes. Or at least will do my very best :)
Simple. I am such a fan of simple food. Simple meals, simple prep work, simple ways of preparing food that leave nothing but clean strong flavors on your tongue. Which explains why I've roasted vegetables at least once a week for the past 6 months or so. I am a roasting machine! Recently at the grocery store I saw this large couscous, and thought, well aren't those cute. I'll readily admit many of my food choices often come down how adorable they are. I mean if a system works....

Turns out pearl couscous is fairly good for you, just another simple grain, click on the link to read all about it. I read several recipes and discovered that toasting this larger couscous before cooking it really helped develop the flavor.

This dish is easy, quick, and FULL of flavor. The large couscous has a delightful texture that slides right down your gullet. This meal is perfect for those who want a lot of flavor, but don't have a ton of time. I'm not sure if the larger couscous is hard to find, though you may need to check a whole foods if your regular grocery store doesn't have it. This meal will definitely become a staple at my house, it only takes about 40 minutes, so try it out!


Israeli CousCous with red carrots, parsnips, and butternut squash

I have a fabulous greek vinegrette I buy at our farmers market that makes a great marinade for roasted vegetables. You can also just coat the vegetables in olive oil with a fresh herb such as rosemary or thyme. 
The Goods: Serves 4-6
2 cups Israeli (aka pearl) couscous
4 cups low sodium vegetable broth
1 medium butternut squash, peeled and chopped
3-4 large red carrots, chopped
5-6 parsnips, chopped
2 tablespoons greek vinaigrette
1 tablespoon olive oil

The Deal: 
1. Preheat oven to 425 degrees. Place parsnips, butternut squash and carrots in a large bowl with the greek dressing. Using your hands evenly coat all the vegetables and spread out on a large cookie sheet. Bake for 20-25 minutes, removing from the oven at least twice to toss the vegetables to ensure even browning.

2. While the vegetables are cooking heat your olive oil in a large skillet over medium high heat. Add couscous and saute until aromatic and lightly browned, about 3-5 minutes. Watch closely, the couscous will burn easily. Once the couscous is lightly toasted add your broth and bring to a boil. Simmer until the liquid has evaporated, about 10-12 minutes.

3. Serve with roasted vegetables on the top and couscous on the bottom.

Sunday, November 13, 2011

Make this casserole! I said do it now!

Butternut Squash, how I love thee.... Let me eat you all the ways.
Casserole. What a great word, I feel happy just saying it. Cass-e-role! Like I'm on-a-role, with Casseroles. What's a shame about casseroles is they are often associated with lots of butter, whole milk and cheese. I know there are healthy casseroles out there, so I'm making it my goal to find some. I love making a dish on Sunday night then having leftovers for lunch the following day, which is when a good casserole comes in handy.
I found this genius recipe in the Moosewood Cookbook aka what I'm snuggling with when Healthy Boyfriend is away. Pretty much everything appealed to me about this recipe. Seasonal ingredients, using yogurt and feta (instead of whole milk or cheddar like many casseroles) and quick preparation time. The squash, onions, garlic, pepper, and eggs were all local which means the dish was pretty darn friendly to the environment. Good for our bodies too!

I made this Saturday night, Healthy Boyfriend and I played Mankala and sung songs while he strummed his guitar. That's us, party animals. Once we finally finished dinner, he made sure to mention how much he enjoyed this casserole. Being someone who usually does not enjoy casseroles he was thrilled by how this one turned out. I thanked him for the compliment, but I had figured out how much he loved it as he went back for fourths.
This casserole is fantastic in its simplicity. What shines through are the natural flavors of the vegetables. The yogurt and egg hold it together and add a creaminess, but mostly you taste squash, onion, and peppers which is delightful. As I've mentioned red peppers and I are not on the best of terms, usually I flat out avoid cooking with them, but I gobbled them up in this dish. There was just enough to give a nice heat, but the red peppers didn't overpower the dish. As far as the topping, I didn't have nuts or sunflower seeds so I just roughly chopped plain sesame sticks which worked great. Really anything crunchy will do, just use what you have laying around.
I will definitely be playing with variations on this basic dish, so stay tuned. And make this casserole, it's just too good to miss.
Arabian Squash Cheese Casserole

Sautéing your vegetables
Throw everything in a bowl, mix, then cook! 
The Goods: 4-5 Servings
2 medium-large butternut or acorn squash
1 heaping cup onions, chopped
1 heaping cup red and green peppers, chopped
2 eggs, beaten
2-3 cloves garlic, minced or pressed
1 cup greek yogurt or buttermilk
1 cup plain feta cheese, crumbled
3 tablespoons unsalted butter
1 tsp salt, more to taste
Fresh ground pepper to taste
Hot sauce (optional)

Topping:
1/2 cup Sesame sticks or Sunflower seeds or Nuts, chopped

The Deal:
1. Preheat oven to 375 degrees. Cut both squash down the middle lengthwise and scoop out the seeds. Place face down on a oiled cookie sheet and bake for 35-40 minutes or until soft. Remove and let cook until handle-able. Scoop out flesh and mash.

Cooking Tip: I did most of my prep work while the squash was cooking.

2. Saute onions and garlic in butter and salt in a large saute pan on medium heat. When onions are translucent, about 3-5 minutes, add peppers. Saute peppers until just under done, about 5-7 minutes.

3. In a medium bowl beat eggs with the yogurt or buttermilk. Crumble in the feta and mix well. Combine all ingredients in a large bowl and stir until evenly combined. Add additional salt, pepper and hot sauce to taste.

4. Spread into a buttered cassarole dish and sprinkle crunchy topping of your choice evenly over the top. Bake at 375 for 10-15 minutes, just until the edges begin to bubble. Serve warm!

Healthier boxed Mac and Cheese!

Dinner for 2. Boom. 
Well this isn't a recipe as much as a neat trick. A friend with 2 kids under the age of 5 (read someone with almost no time or energy to cook, but still wants to feed their kids healthy food) found this idea in a parenting magazine and I'm stealing it.

I think it is safe to say that we all rely on boxed mac and cheese from time to time. Or weekly in some cases. Now I wouldn't say any boxed mac and cheese is "healthy", but Annie's definitely makes the healthiest cheap organic mac and cheese I have found. It has the lowest sodium content and the least amount of ingredients, which means the least amount of added chemicals. More importantly they have bunny shapes, I mean I'm human of COURSE I want my macaroni to be in a cute little bunny shape.
Notice my green beans in the background. Don't forget a good green! 
So next time you make boxed mac and cheese instead of using butter and milk use:
4 tablespoons plain greek yogurt
1 (4 oz jar) of Earth's Best sweet potatoes baby food

Combine the yogurt, sweet potatoes and cheese packet in a bowl and stir until smooth. Cook macaroni as directed, then stir in your healthier mixture and enjoy!

The yogurt adds protein and the pureed sweet potato has Vitamin A, Iron, and Calcium. Plus I think it this way tastes better than with milk and butter and it's better for you.
Anyone I've been pretty excited since I learned this little trick, hope you like it too!

Thursday, November 10, 2011

Sweet Potato Pancakes

Yes, they are as good as they look
Sometimes a cookbook is so genius, I actively can't stop thinking about it. I bring it to bed with me and end up reading new recipes until way past happy bedtime. If you have never read the Moosewood Cookbook, you are seriously missing out on some fun creative food. It is an older book, but definitely a staple in many vegetarian kitchens. Including my mothers, which is in fact how I got the book. It went something like this:
Me: Mom I'm taking this book home.
Mom: No, that's my book Bunny, you can't take it.
Me: Name the last time you cooked something from this book.
Mom: I.... (pauses) Look, that's my book, you can't just-
Me: Listen, I need it more, I'll bring it back. Thanks!

And just like that I have a new book, that I am technically borrowing. Man kids are selfish, even when they are in their late twenties. Anyhoo back to the recipe.
So this recipe is so freakin tasty I'm sure to make it again soon. A bunch of vegetables, some egg and flour to hold it together, and wham! Delicious vegetable pancakes in 30 minutes or so. These suckers attracted me for a few different reasons, the largest being I had 90% of the ingredients already in my kitchen. All the vegetables used are still in season (depending on where you live obviously) plus I had local eggs and garlic just waiting to be used in something scrumptious. I've seen many vegetable pancakes and all seem to be fried in butter instead of baked. Of course I would like to avoid frying, but I mean it's all vegetables, what do you WANT from me? I want delicious vegetable pancakes, so frying in butter it is!
These little babies are delicious and take almost no time. I suggested in the recipe making them all at once and keeping the completed ones in a preheated oven until you finish cooking them all. I really can't imagine anyone one not liking these, even picky little kids loves these guys. Honestly sweet potatoes are kinda the whores of the vegetable family, every body wants a taste. Be sure you are serving a nice nutritious green on the side, green beans, broccoli, kale chips, anything green and leafy will do.
I will be blogging a BUNCH of recipes from the Moosewood Cookbook in the weeks to come. You are welcome, in advance. This post is kinda scattered, but the flavor of these pancakes is solid. A big thanks to my Mom for letting me borrow a new inspirational book. Huzzah for Mommas!

Your "batter"
Frying them up
Lightly browned, crispy and vegetarian. Yum!

Sweet Potato Pancakes
Adapted from Moosewood Cookbook

The Goods: Serves 4-6
1 cup carrot, grated
1 cup white potato, grated
1 cup sweet potato, grated
4 eggs, beaten
1/3 cup flour
2 tablespoons onion, grated
1 garlic clove, crushed
juice of half a lemon
1/4 cup parsley, chopped (optional)
1 teaspoon salt
1/2 teaspoon pepper
Dash nutmeg
Unsalted butter for frying

Suggested topping:
1 cup sour cream or greek plain yogurt
2-3 tablespoons chives, minced
Dash of salt and pepper
Dash of lemon juice (optional)
Combine all ingredients

The Deal:
1. Place grated sweet and white potatoes in a colander over a bowl. Salt lightly and let stand 15 minutes. Lightly rinse and squeeze out well to get rid of all the extra water. Preheat oven to 250, and place a cookie sheet inside.

2. Toss all ingredients in a bowl and mix to combine. Heat enough butter to coat a large skillet on medium high heat. Once butter is hot, scoop a scant less than 1/2 cup of the mixture in your hand and flatten to make into pancake, then place in pan. Use a spatula to help form it (see pictures above). You should get 2-3 in a pan, fry on each side until golden brown, about 3-4 minutes per side. Repeat with remaining batter, adding butter as needed. Place finished pancakes in the preheated oven to stay warm until all are cooked.
Serve hot with sour cream or yogurt mixture.

Wednesday, November 9, 2011

Butternut Squash Tacos! This is no BS.


Family Friends often inspire the greatest dishes. These tacos were inspired by some of the best damn tacos I've ever had. Though like so many delicious dishes, the Carmola tacos are filled with seasoned chicken and then fried in oil. I'll admit I have dreams about those tacos, and someday I will make them the traditional way. Unfortunately fried in oil usually isn't in the same sentence as super healthy for you.

Recently I was talking to a Erin Carmola, one of the Carmola clan, and we starting reminiscing about how good her parents tacos are, and if we could brainstorm how to make them healthier. She suggested ground turkey, but I am pretty sure that isn't vegetarian. She also suggested trying to focus on the spicing of the dish to make up for the lack of frying. For filling I knew I wanted to use seasonal ingredients, hence the butternut squash. Black beans are just plain ole good for you tasty beans. They've got all kinds of good stuff like fiber, protein and manganese, click on the link to read more.

In general, store bought taco seasoning is ridiculously high in sodium and other highly processed chemicals. I found a few recipes online for DIY taco seasoning which was super easy to make and most people should have these spices laying around the kitchen already.
So were these healthier tacos a success? Absolutely! Unless of course you have had the Carmola tacos, because they were just NOT as good. But for a quick healthy vegetarian taco they were all I could ask for. Definitely will be a staple at my house from now on. The squash and black beans were perfect together and the seasoning was flavorful without taking over the whole dish. Also I think anyone would eat these, the flavors are simple but dead on. Plus with your own seasoning, people can add more or less depending on preference.

As far as the recipe below, I did my best to give correct measurements but a lot of it is just common sense. Hopefully everyone knows how to make a taco. In terms of seasonings, I add less so I can still taste the vegetables, but adding more is fine, especially since it's homemade. Also it's another reason to make guacamole, which I could eat by the spoonful. And did.

Butternut Squash Tacos
Adapted from my brain

Getting ready to roast
Pasty
The Deal: Serves 4 plenty
Tacos
1 large (2 1/2 lbs) butternut squash, peeled and diced into 2 inch cubes
1 can black beans (organic is best because it has the lowest sodium content)
1 tablespoon olive oil, plus more for brushing
12 tortillas (choose ones you like)
A good dash of salt and pepper

Taco Seasoning: 
2 tsp chili powder
1 1/2 tsp paprika
1 tsp onion powder
1/2 tsp sea salt (you can also use seasoned salt)
1/2 tsp garlic powder
1/2 tsp ground cumin
1/2 tsp oregano
Dash of cayenne (add more or less depending on preference)
Freshly ground pepper to taste

Suggested Toppings: grated cheddar, salsa, Guacamole, lettuce, spinach, tomatoes, onion, and cilantro

The Deal:
1. Preheat oven to 375 degrees. Place squash on a large baking sheet with the olive oil, salt and pepper. Toss with your hands being sure the squash is evenly coated. Bake for 15-20 minutes, taking out and tossing once to ensure even browning. Remove when golden brown and soft.

2. While your squash is baking make your seasoning. Mix all the taco seasoning ingredients in a bowl and stir to blend. Drain black beans and place in a pot over medium heat to warm up. Once warm, remove from heat and crush with a potato masher. Just enough so it forms a paste, which makes it easier to spread. Add a good teaspoon of the taco seasoning, and then add more to taste.

3. Place baked squash in a bowl and mash to make a paste. Add a teaspoon of taco seasoning and then adjust to taste. Heat a large skillet on medium heat. Add a tortilla and heat on both sides until tortilla is soft and warm, 1-2 minutes. Remove and place on plate. Add a heaping spoonful of squash, then beans and spread evenly on one side. Fold in half to form a taco. Lightly brush the outside with oil and place on a baking sheet. Repeat with remaining tortillas. Bake tacos for 10-15 minutes, flipping once half way through to ensure even browning. Remove when golden brown and serve warm.
Place on the table with cheese, guacamole, salsa, lettuce, tomato, etc and let people add toppings as desired.

Monday, November 7, 2011

G is for Ginger Molasses cookie.


If I was scoring redeemable value for these tasty treats, it would probably be in negative numbers. I wish I could say they are good for you in some way, but they just AINT. I will attempt to make them next time with part chia gel, but since I'd never made these cookies before I wanted to know what they should taste like before experimenting. Cookie experiments is the kind of science I'm in to.
Perhaps if you have a big healthy salad and teach some blind kids to read you can indulge in one of these delightful suckers. I just wanted to make them so I did. So there. No good reason besides I like cooking cookies.
Everyone is different, but when it comes to cookies I'm a chewy gal all the way. It is a rare occasion I hope for a crunchy cookie, almost always longing for a soft bite that slowly dissolves in my mouth. These chewy spice filled rounds were perfect. Soft, full of ginger and molasses flavor with a nice subtle crunch from the sugar on top. They were easy to make, just took a bit of time. Actually I made one batch the first night and then one batch two nights later. The dough held up great, just make sure you seal it tightly. I think the pictures express enough, no need to ramble too much about how delicious sugar, butter, ginger and molasses are. They are FREAKIN cookie-tastic and I want some right now. These would be a great treat to bring to a holiday party ie not a good idea for a night alone watching repeats of the Vampire Diaries (That is not me, it is some other crazy person...). Hope you enjoy these as much as I did, make sure to share. I did. Mostly.
Step One butter and sugar
Sticky Dough, needs refrigeration

Cold Dough, ready to be balled up
Sugar! 
Ginger Molasses Cookies
Flat out taken from Orangette

If you can wait these puppies are twice as good the next day. Something magical happens if you let them rest a night. Trust me, the flavors develop so do your best to eat these the next day. 
The Goods: Makes about 22 cookies
2 1/4 cups unbleached all purpose flour
1 1/2 tsp baking soda
2 tsp cinnamon
1 1/2 tsp ground cloves
1 tsp salt
1/2 cup vegetable shortening, room temperature (try to buy non-trans fat brand like Spectrum)
6 Tbs unsalted butter, room temperature
1 1/2 cups light brown sugar
2 eggs
2 tsp fresh ginger, peeled and grated
1/3 cup molasses
1/2 cup granulated sugar (such as unrefined cane sugar)

The Deal: 
1. In a medium bowl combine the flour, baking soda, cinnamon, ground cloves, and salt and mix with a whisk to evenly blend. Set aside.

2. In a large mixing bowl with electric mixers, cream shortnening, butter, and brown sugar until smooth and pale in color. Add the eggs one at a time, mixing until incorporated and scraping down the sides of the bowl between each addition. Add the ginger and molasses, and mix to blend well. Scrape down the sides of the bowl again.

3. Using a rubber spatula, fold half of the flour mixture into the wet mixture. After the first half is incorporated, add the remaining flour and continue folding gently until all of the flour has been absorbed. Scrape down the sides of the bowl, cover it with plastic wrap and place in the fridge for at least two hours. You CANNOT skip this step, the dough will be way too sticky without chilling.

At this point the dough can hold for up to 4 days


4. Preheat the oven to 350 degrees Fahrenheit, and line a baking sheet with parchment paper or a silicone liner. Pour the granulated sugar into a pie pan or shallow bowl.

5. When dough is solid and cool enough to handle without horrible sticking, scoop it out of the bowl and roll it into balls a scant 2 inches in diameter. Toss each ball gently in the sugar, and then place them on the baking sheet (about 6-8 per sheet), leaving 3 inches between each ball. Bake cookies on the center rack of oven for 15-17 minutes, until golden brown and slightly puffed. Let cool on baking sheet for 15 minutes before transferring to a rack. Repeat with two more sheets.

Wednesday, November 2, 2011

Baked Sweet Potatoes with Ricotta Bruschetta and Caramelized Onions

Little bites of fall heaven
Creating recipes is tough, yall. This dish was inspired by a need to use up some food in my kitchen. It was a very make it up as I go type dinner that happened to work out well. Score, there is usually about a 50/50 shot of that. I knew I needed to use a half empty container of ricotta and already had flagged a recipe for ricotta bruschetta in one of Barefoot Contessa's cookbooks. The recipe called for the cheese mixture to be served on toasted bread, but I wanted to healthy that up a bit. That began the elaborate process of looking around my kitchen to see what else I could use. My eyes surveyed the bowl of local vegetables on the counter and honed in on some boring looking sweet potatoes. Of course we all know how far from boring sweet potatoes taste, but they are not lookers. Yellow onions hid underneath the sweet potatoes, just hoping to get thrown in the mix. My college roommate and I used to make these baked sweet potatoes that were so (oooooooo) good, and since I had local sweet potatoes I figured might as well combine two awesome recipes to see what would happen.

Success! Baked Sweet Potatoes topped with an herby ricotta mixture finished with sweet caramelized onions were in fact little bites of savory goodness. Baking the sweet potatoes gave them a lovely soft texture while the breadcrumbs added a needed crunch. The ricotta bruschetta was light and full of all the right herbs, while caramelized onions finished it off with a hit of sweetness. I'm sure I could improve on this recipe, and will certainly try, but for now it's pretty freaking good. It is a good main course, served with a side of green vegetables, but would also make a great appetizer. As an appetizer I would try to get small thin sweet potatoes as to make them bite sized. I used large sweet potatoes, which required a plate and a fork if you consider yourself fancy.
Sliced avocado was what I wanted to top these with first, but they were all rock hard and expensive at the grocery store. The onions were delicious, but I bet you could top this with fresh tomatoes, avocado, perhaps evenly lightly sautéed mushrooms. All the vegetables used in this (except the herbs) are seasonal, and the greens, browns, and orange are perfect fall colors to decorate your dinner plate.


Ricotta Bruschetta with Baked Sweet Potatoes
Adapted from my brain, with help from the Barefoot Contessa.


The Goods: Serves 4-6 as main course
2-3 large sweet potatoes, sliced 1/4 inch
2 cups breadcrumbs ( I prefer panko, just read the ingredients before you buy them)
4 tablespoons (more or less) of butter, melted plus 2 tablespoons for the onions
2 cups ricotta
3 tablespoons scallions white and green parts, minced
2 tablespoons fresh dill, minced
1 tablespoon fresh chives, minced
1 large yellow onion, halved and sliced in 1/8 inch slices
Kosher salt and freshly ground pepper to taste

The Deal:
1. Preheat oven to 375 degrees and grease 2 large cookie sheets. First caramelize your onions: In a large saute pan on medium high heat melt 2 tablespoons of butter. Add onions and saute until lightly browned, about 10 minutes. Stir frequently. Reduce heat to medium (or medium low depending on your burner) and cook onions until soft and browned, about 40 minutes. Only stir occasionally, but watch for burning. If they begin to burn reduce heat.

2. Set up your breading station. Place melted butter in a shallow bowl. Then place breadcrumbs and a good dash of salt and pepper in second bowl. Coat sweet potato in butter, letting excess butter drip off, then dredge in the breadcrumbs being sure it is evenly coated. Place on the greased cookie sheet. Repeat with remaining sweet potatoes. Bake until lightly browned and soft, about 20-25 minutes.

3. While sweet potatoes are cooking, make your ricotta bruschetta. Combine the ricotta, scallions, dill, chives, 1 teaspoon salt and 1/2 teaspoon pepper in a bowl.

4. Once your sweet potatoes and caramelized onions are ready, assemble your dish. Place 1 breaded sweet potato on the plate, followed by a heaping tablespoon of ricotta mixture, and finish with a a good dash of onions. Serve immediately.

Sunday, October 30, 2011

Criss Cross Apple Sauce

Yeah, I got sauce.

As I've mentioned, I'm on an apple binge. Who knows when the insanity will stop? I'm not sure yet, but I'll let you know. For now Applefest 11 continues in my kitchen, with no end in sight. The reason for making apple sauce was one of necessity. I had a whole crap ton (that's the scientific measurement) of apples that needed to get gone. I was in a lazy (read grumpy) mood so did not want to do anything to complicated or time consuming. I stumbled across this apple sauce recipe which looked simple and delicious; Sweet, the two things I was looking for.
Apples and Apples and Apples and Apples.
Now there are several different ways to make apple sauce, this is just one that looked appealing to me. I will as always try other recipes, given this one only lasts a few days in the fridge and I would prefer to find a recipe that lasts a few weeks. Other than that I loved the simple apple flavors and the chunky consistency. This is also an easy way to make a healthy dessert. You can also use apple sauce in recipes, I recently made a carrot cake (recipe coming soon) that uses apple sauce which was delicious. Anyway apples are freaking everywhere right now, so go get you some apples and sauce it up. 

Classic Apple Sauce
Adapted from Simply Recipes

Be sure to use good cooking apples such as Jona Gold, Mcintosh, Granny Smith, Fuji or Golden Delicious. The sugar measurements are just suggestions, use more or less depending on your preference. 
The Goods: 
3 to 4 pounds apples, peeled, cored and quartered
3 strips lemon peel-use a vegetable peeler to make strips
2 tablespoons freshly squeezed lemon juice
3 inches of cinnamon stick
1/4 cup brown sugar 
up to a 1/4 cup white sugar
1 cup of water
1/2 teaspoon salt

Serve with yogurt, ice cream, or a small drizzle of half and half. 

The Deal: 
1. Place all ingredients in a large pot. Cover and bring to a boil. Lower heat and simmer for 20-30 minutes or until apples are very soft. 
Throw everything in a pot
Simmer the crap out of it. 
2. Remove from heat and discard lemon peels and cinnamon stick.  Mash with a potato masher. Serve warm or refrigerated. This will only keep in the refrigerator in an air tight container for a few days.

You can also freeze it for up to one year, just defrost before using.

Thursday, October 27, 2011

Ginger Apple Cake

I love the red and green peels peaking through
I seem to be on an apple binge. I suppose in trying to cook seasonally I may go a little overboard sometimes. I will also admit, I'm a fruit-aholic. It's rare for me to find a fruit I don't like, and by like I mean eat in ridiculous portions. During strawberry season I believe I ate enough strawberries to be part one. So as fall approaches with its squash and root vegetables the fruit selection is fairly slim. Sure there are pears, but there aren't a ton of those around these parts. Then of course there are the incredibly non local bananas, mangos and my personal favorite pomegranates. Apples are the local fruit at the market, so I'm doing my best try as many different recipes as I can. Trying to figure out which type I like best  Jona Gold, Pink Lady, Stayman, Winesap, is a task I am happy to take on.

I love how earthy it looks. Or is that just me? 
When I saw this recipe on 101 Cookbooks, I knew I had to try it. A cake that has only half a cup of sugar, 1/4 cup of butter, whole wheat flour and no frosting? Might I even dare say a healthy cake? I do! I dare! This is about as healthy a cake you can make while still using standard ingredients. This cake really knocked my pants down (Not that hard to do given I'm such a food newbie. Or if you are healthy boyfriend....) It was moist and had a lovely apple fall flavor. The bits of apple chunks were a treat in my mouth, a juicy surprise surrounded by moist cake and subtle ginger flavor. If you are not a fan of ginger, you can just omit it, as it was not in the original recipe. Though you may want to ask yourself why you don't like ginger, what is WRONG with you?! Along with apples, I'm also on a ginger binge tossing it in any recipe I can. I think the ginger and apple pair beautifully together, but the cake will still be delicious without it. This adorable cake would be a great one to bring to a fall party, and I know kids love it too. The cinnamon and apple chunks make it sweet enough that it doesn't taste "healthy". The kids don't need to know it only has half a cup of sugar.
The recipe calls for only red apples, but I did not have enough red ones so I used one green apple. I liked the multi-colored touch, but use all the same type of apple if possible.
Ginger Apple Cake
Adapted from 101 Cookbooks

If you don't have whole wheat pastry flour, feel free to substitute all purpose flour. Make sure to leave the peels on the apples, it won't be nearly as pretty without that touch of color.
The Goods: Makes one cake
2 cups sweet crisp red apples, cut into 1/4 inch cubes (peels on)
2 1/2 cups whole wheat pastry flour
1 tablespoon baking powder
2 teaspoons cinnamon
2 teaspoons fresh ginger, grated
Dash Nutmeg (optional)
1/2 cup dark brown sugar, lump free
1/2 teaspoon fine grain salt
2 eggs
1 cup buttermilk
1/2 cup walnuts, lightly toasted* and roughly chopped (optional)
1/4 cup butter, melted and cooled a bit
3 tablespoons large grain sugar
1 lemon, juiced

The Deal:
1. Preheat oven to 400 F degrees, racks in the middle. Butter and flour one 9-inch square baking dish or tart pan. Place chopped apples in a bowl of water and lemon juice, set aside. Combine flour, baking powder, cinnamon, nutmeg, brown sugar, and salt in a large bowl. In a smaller bowl whisk together the eggs and buttermilk. Then whisk in butter and ginger. Pour the buttermilk mixture over the flour mixture and stir until barely combined-careful not to over mix. Drain the apples, then fold apples and half of the walnuts into the cake batter.
Making your batter
Folding in your drained apples and nuts
2. Spoon batter into the prepared pan, pushing it out toward the edges. Sprinkle with most of the large sugar and the remaining nuts. Bake for about 20-25 minutes or until the cake is just set and a touch golden on top. Serve warm or at room temperature.
Ready for the oven
*To toast walnuts, place in a skillet on medium heat. Heat until VERY lightly browned, about 5-10 minutes. They should smell toasted. Watch carefully, it's very easy to burn your nuts. (Insert nut joke of your choice here)