Saturday, April 30, 2011

Spicy Peanut Noodles with Broccoli

Peanut---Peanut butter, and NOODLES!
Finding staple dinners is one of my larger missions with this blog. I love when I have hours to dot around in the kitchen, but most of the time I have a short window to cook in, and I want to find recipes that I can whip up and taste great. Of course being healthy makes them even better!

Asian cooking has heaps of vegetarian recipes, and I have just started exploring the flavors of this type of cooking. I would love to get the rough basics of Asian, Indian and Thai cooking, but of course it takes the time.

This dish is a play on peanut sauce, which I believe is Thai, but Im not sure. Regardless, its ridiculously tasty, and this dish will definitly be something I make come back to. Its also great to make for a big group, the ingredients are cheap and it whips up quick.

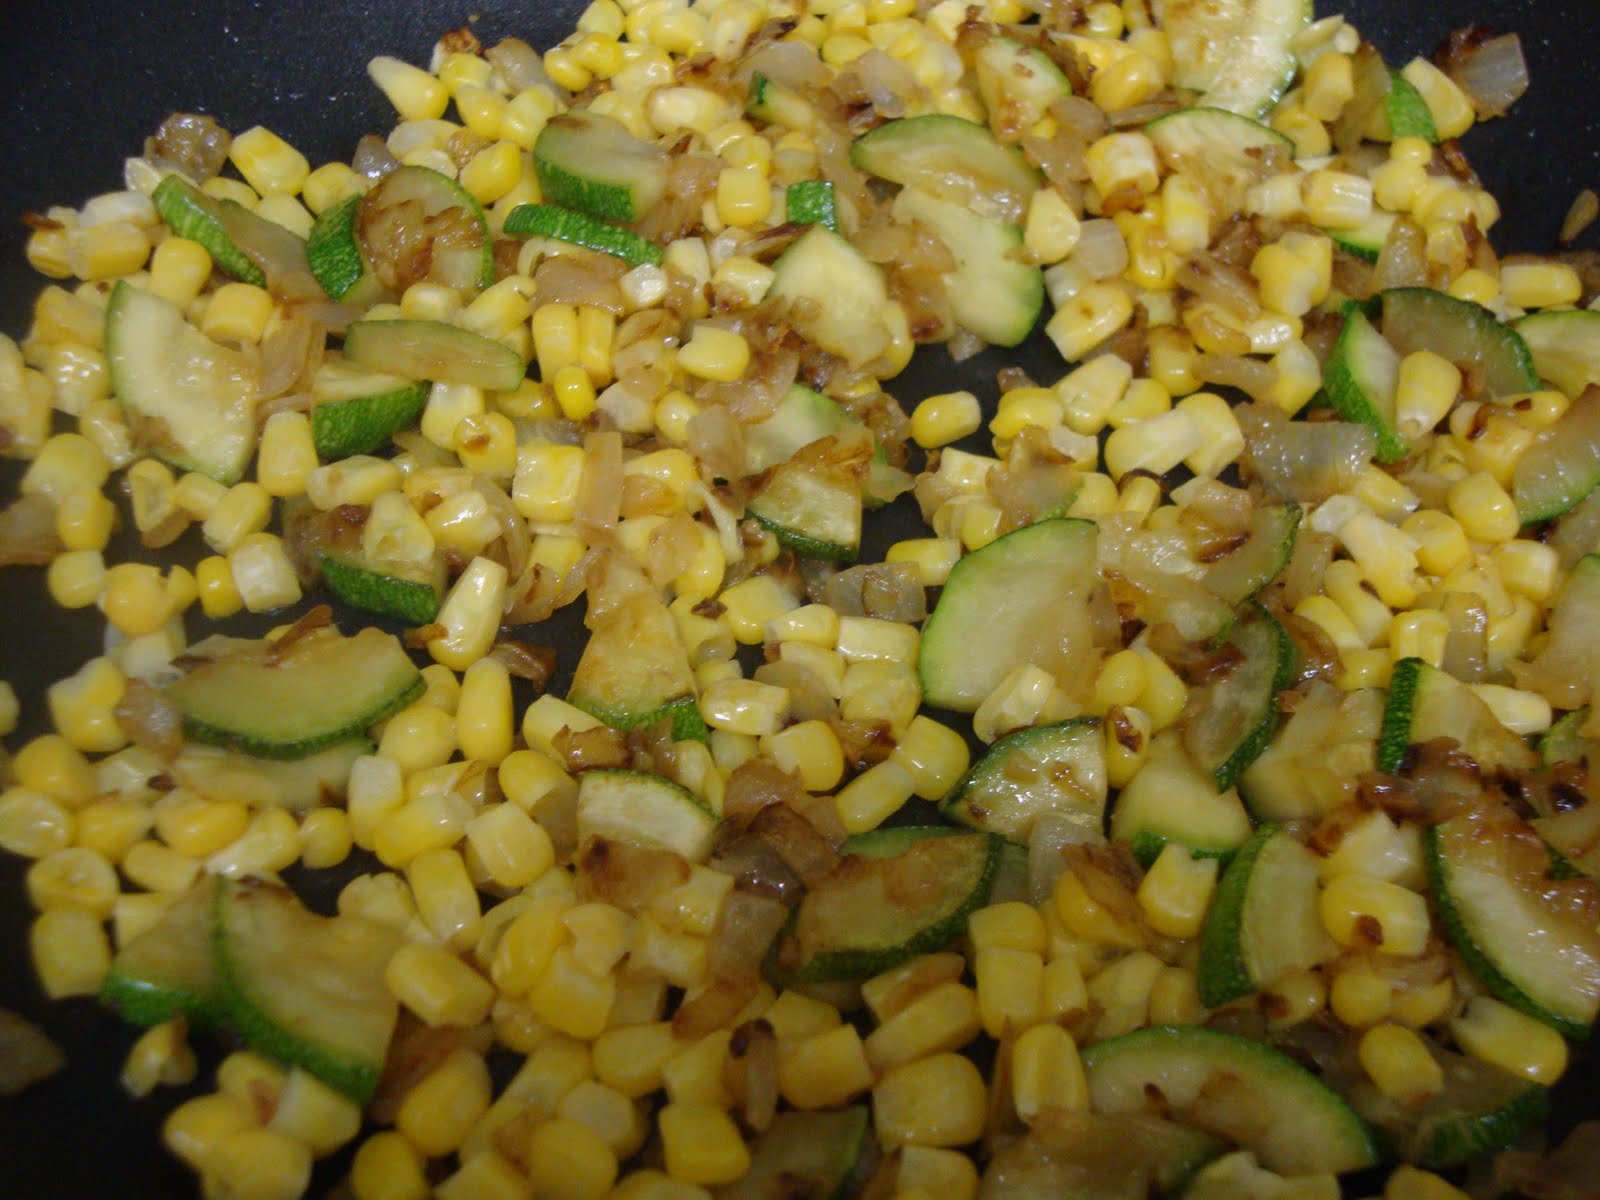
As I mentioned in my last blog, I have been reading "Simple Vegetarian Pleasures" by Jeanne Lemlin and this recipe is straight from that book. She said this dish was a staple in her house, because it was so easy and quick, and after trying it I know why. My addition was broccoli, because I wanted to make sure I had a good green vegetable. Carrots, shallots, garlic, corn, zucchini could all be great additions, the sauce is very versatile.

Clearly I LOVED the flavors in this dish. I would like to play around with them a bit more, next time I might try more peanut butter and less sesame oil, or perhaps add some rice vinegar, but this is a great base to work with. A bit more oily because of the sesame oil, and not as thick as a sauce with a large peanut butter base.

Another benefit to this dish is how long it takes to make. Thirty minutes total, and that includes your prep work. Good for those who want a quick meal or have tiny hungry children to fed. Hope yall enjoy!


Spicy Peanut Noodles with Broccoli
Brown and green look so lovely together
The Goods: Serves 3-4
1/4 cup natural peanut butter
1/3 cup Braggs liquid Amino Acids or Tamari soy sauce
2 tablespoons water
1/3 cup firmly packed light brown sugar
1/4 cup oriental sesame oil
2 garlic cloves, minced or pressed
1 teaspoon minced fresh ginger
1/2 teaspoon crushed red pepper flakes
6 scallions, thinly sliced
2 cups of broccoli, chopped
1 pound of spaghetti

The Deal: 
1. Bring a large stockpot of water to a boil.

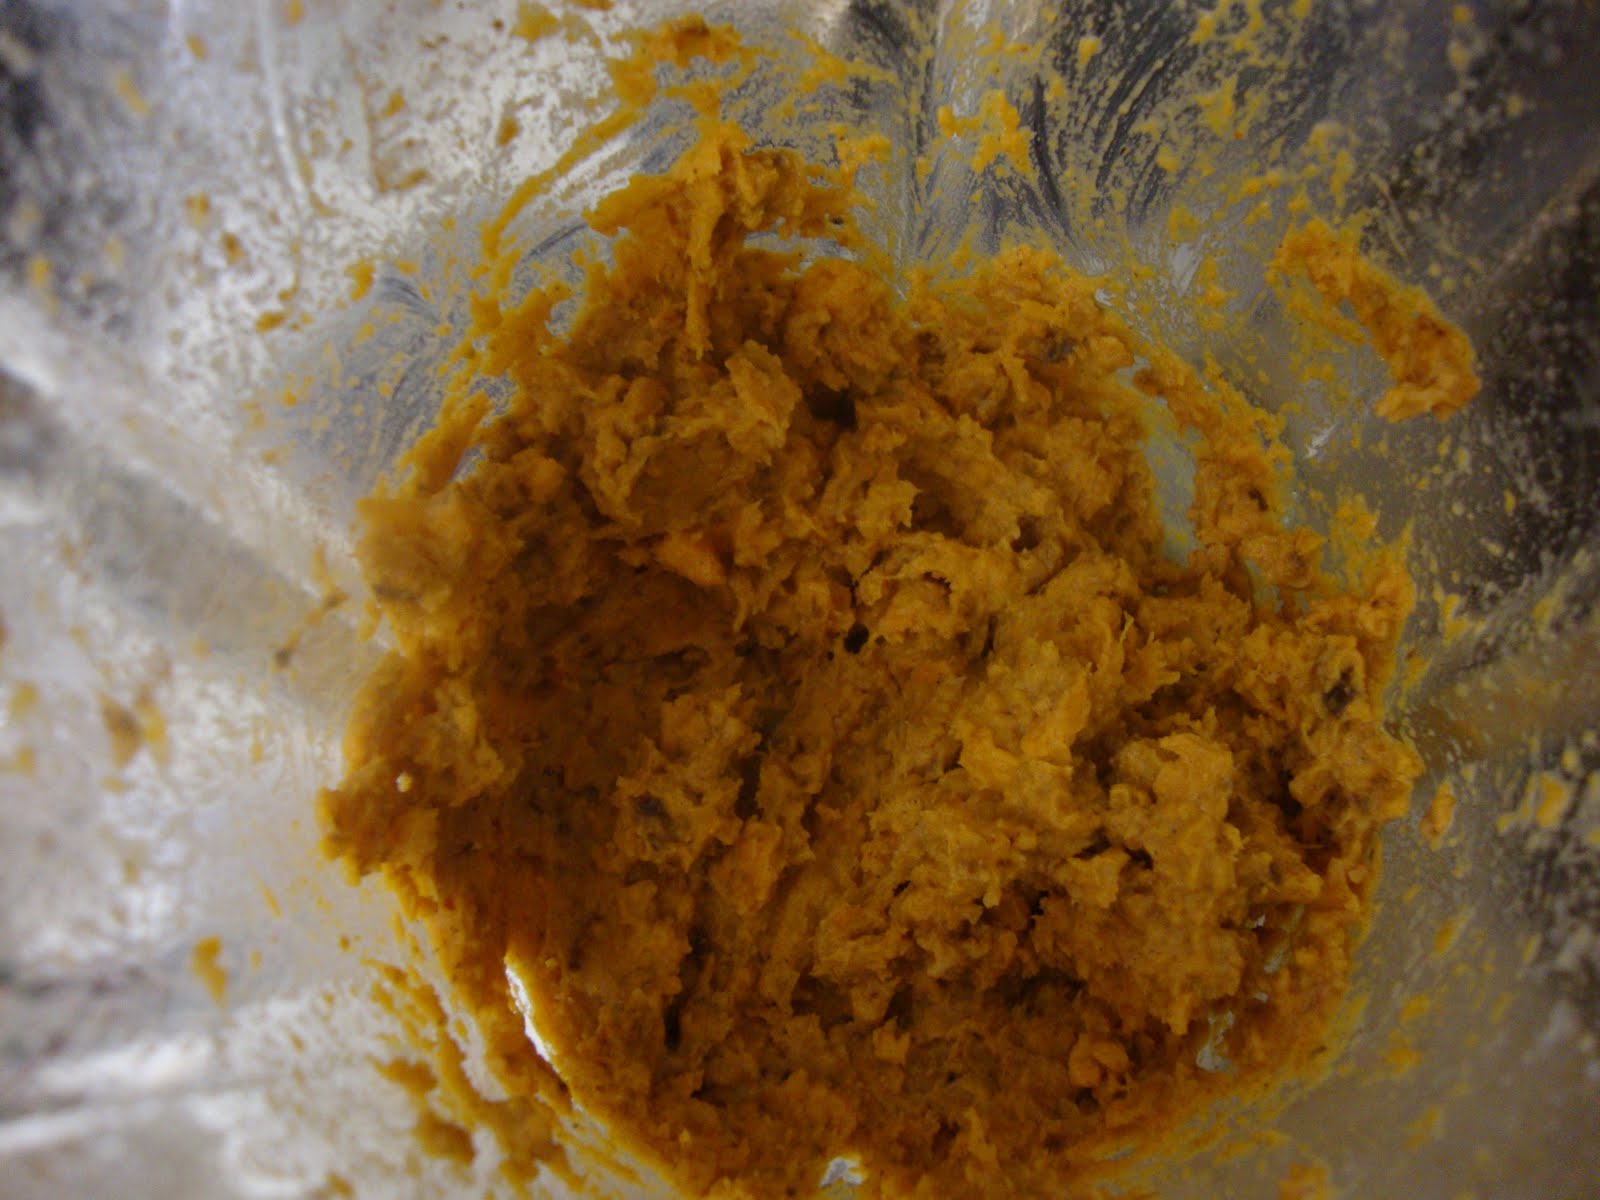
2. Meanwhile whisk together the peanut butter and soy sauce in a small saucepan. Stir in all of the remaining ingredients-- except the the reserved scallions, broccoli and the spaghetti-- until smooth. Put low heat under the pot and warm the sauce, stirring occasionally.
This guy is saucy!
3. Drop the spaghetti into the boiling water and cook until al dente. Don't overcook the pasta; it should be chewy.

4. Once the pasta is cooking, steam your broccoli. Once pasta and broccoli are ready, drain pasta in colander and return to pot. Pour on the peanut sauce and broccoli and toss. Grabs some bowls and garnish with remaining scallions.

Thursday, April 28, 2011

Blackberry Cream Cheese Brownies

A vampire ate my recipe! or I spilled the Jam.
Clearly my sweet tooth went WILD this week. Two desserts in a row, how COULD I. My only excuse is I made the cookies for Easter and the brownies for my last writing class. I finally figured out how to make sweets, for OTHER people. I will now be known as the girl who brings sweet treats. This way I can cook my yummy desserts, without having to eat them all. Perfect!

I must warn you about these brownies, DO NOT make them alone. They may be the best brownies I've ever had, and I am glad I made them for other people, because I could have eaten them all myself. More like fudge in consistency, they should be called crack brownies. 

The recipe said cut into small squares and it was right. Rich and creamy, a normal brownie size would probably be too much. Also cutting them into smaller pieces helps in restraint. 

Time wise, these guys are a commitment. Actual in the kitchen time is about 35 minutes, but they have to bake for an hour and then cool for about 2 hours, so these are not a whip up and eat dessert. But just like your virginity, its well worth the wait. 

Could look nicer, but couldn't taste better
Now, as usual, mine did not look like the picture. They tasted like heaven, but they were not as pretty as Cooks Illustrated. They were not hard to make, but again layering the filling can be tricky. Something one gets better with in time. 

Originally these brownies were made with raspberry jam, but I had blackberry jam so thats what I used. I think either would be good, just be sure its a high quality jam because it adds a fruity richness to the brownie and you wouldn't want the jam to taste cheap. 

Speaking of cheap, be sure you get UNSWEETENED chocolate. Even semi sweet has enough sugar added that it will change the flavor of the brownies. You want them sweet, but no sickly sweet. I found these brownies to be so good because they were not overly sweet. Don't get me wrong, they have plenty of sugar, but there is a difference in flavor between sweet and rich. These are rich. 

Honestly if you have a bake sale or need to impress, make these puppies and watch as people fall in love with you. 

The recipe is from Cooks Illustrated, a wonderful magazine with incredible recipes. I recently got an online subscription to the website and am loving all I'm learning. Enjoy everyone!
Blackberry Cream Cheese Brownies
Not the best picture, but da taste was DA BEST!
The Goods: Makes 25 small squares

Filling: 
1(8 ounce) package of cream cheese, softened
1/4 cup sugar
1 large egg yolk
3/4 teaspoon vanilla extract

Brownies:
2/3 cup all purpose flour
1/2 teaspoon baking powder
1/2 teaspoon salt
8 tablespoons(1 stick) of butter, chopped into pieces or 4 tbsp butter 4 tbsp earth balance
4 ounces unsweetened chocolate, roughly chopped
1/2 cup blackberry or raspberry jam
1 1/4 cups sugar
3 large eggs
1 1/2 teaspoons vanilla extract. 

The Deal: 
1. Be sure oven rack is at the middle position and preheat oven to 350. Grease an 8 inch baking pan with butter or spray. 

2. To prepare the filling process cream cheese, sugar, egg yolk, and vanilla in a food processor until smooth. 
Cream cheese mixture, try not to eat it!
3. To make the batter, combine flour, baking powder and salt in a small bowl. Microwave butter and chocolate in a large bowl, stirring occasionally, until smooth, about 1 minute. Whisk in 1/4 cup jam and let cool slightly. 

4. Add sugar, eggs, and vanilla to chocolate mixture, stirring until combined. Whisk in flour mixture until incorporated. 
Making your brownie batter
3. Now to layer the filling. Microwave remaining jam until warm, about 30 seconds, and stir until smooth. Scrape half the batter onto the prepared pan and smooth over. Then dollop cream cheese filling over the batter and spread and even layer. Next dollop warm jam over the filling and using the tip of a knife to swirl jam through the filling. Finally spread remaining batter evenly over filling. 
Dollop the cream cheese mixture then spread
Dolloping jam
Swirl the Jam, fun and pretty
4. Bake your brownies until toothpick inserted in center comes out clean with a few dry crumbs attached, about 50 to 60 minutes. Cool in pan on a wire rack for at least two hours. Cut into 1 1/2 inch squares  and serve. You can also refrigerate in an airtight container for two days. 

Grab a glass of milk, and BUNCH of people and enjoy these yummy treats!

Tuesday, April 26, 2011

Chocolate Earthquakes

An earthquake of sugar....yum.
Speaking the name of these cookies gives you a pretty good idea of how they taste. A chocolately delight is how!  Easter Sunday has always been more about what I eat, than the fact that Jesus did some chilling out post death. I went to church growing up, every Sunday, but it was Unitarian church so often we were outside celebrating trees and the earth as much as Jesus. Honestly all I could think about was getting my cheap, ugly wicker basket in hand and scouring the feild looking for the precious candy. I have to avoid jelly beans in the supermarket because they are tiny beans of crack. To me, anyway. This year I did not eat ANY easter candy, beside a few jelly beans on Sunday. Quite an accomplisment for someone who used to eat her weight in reeces eggs and starburst jelly beans.

My mother made her famous ham. Its fame is known far and wide by our close friends. I dream about this ham, and luckily she has been making it for Easter for the last few years. I sadly will not post the recipe because no matter how hard I wish, ham is simply not vegetarian. Sometimes the truth hurts. Also I don't need to know this recipe, because it is too yummy, and I would not use my power for good. I would use it to consume a whole ham.
Ham and Angels, thats Easter!

The recipe I used comes from Vegetarian Pleasures, a book by Jeanne Lemlin. I own "Quick Vegetarian Pleasures", and for Easter my mom got me "Simple Vegetarian Pleasures" which I haven't stopped reading since I received it. As yall know, I have the best Mom of all time! Jeanne Lemlin has incredible recipes and her books were written in the 90s so are cheap to get on Amazon or used books stores. I highly recommend buying her books, regardless of your vegetarian status, she is a great writer and I have yet to make a recipe I didn't love. In the next few weeks I will be making many of her dishes, so stay tuned!

As far as the cookies, the directions instructed me to melt the chocolate on the stove, but I find that can be tricky and because I do not have special dual pots for melting chocolate, I used the microwave. Feel free to melt it on the stove, just watch it very carefully. Burned chocolate cannot be saved.

These are fairly simple and quick to make, though you do have to refrigerate the dough for 2 hours or so before you can bake them. The dough can refrigerate for up to 24 hours, so they are good to make ahead of time and pop in the oven right before you serve them. You can also freeze the dough, just defrost them before you coat them in the powdered sugar.

Chocolate Earthquakes
Watch out! Its an earthquake of CHOCOLATE. The BEST kind! 
The Goods: Makes 4-5 dozen cookies
8 tablespoons(1 stick) of unsalted butter
4(1 ounce) squares unsweetened chocolate
4 large eggs
2 cups sugar
2 teaspoons vanilla extract
2 cups unbleached flour
2 teaspoons baking powder
1/2 teaspoon salt
1 cup confectioners sugar

The Deal: 
1. Microwave butter in a medium bowl until melted. Add chocolate two squares at the time, stirring about every 20 seconds. Once melted, set aside and let cool.

butter and chocolate, together at last! 
2. Whisk the eggs in a large bowl. Whisk in the sugar, vanilla and melted chocolate mixture. Slowly add the flour, baking powder, and salt, and whisk until smooth. Chill the mixture until cold firm, at least 2 hours or up to 24 hours.
Making your dough
3. Preheat oven to 350 degrees. Grease two baking sheets and be sure the one oven rack is in the center and one is on the upper level.

4. Place the confectioners sugar in a small bowl. Scoop a heaping teaspoon of cookie dough and roll it between the palms of your hands and form it into a bowl. Roll it in the powdered sugar and coat well. Place on the baking sheets, about a dozen per sheet.
Be sure they are well coated in sugar
5. Bake the cookies for 12 minutes, switching the placement of the baking sheets halfway through the cooking time so to not burn the bottoms. Cool slightly. Using a spatula move the cookies to a wire rack to cool. Serve warm or cool completely before storing.

Thursday, April 21, 2011

Black Bean and Sweet Potato Quesadillas

Another quesadilla, how exciting! And cheap and easy for me! I intended to make all these last week, but instead had thrilling meals such as SOUP, and the oh so famous english muffin with earth balance.
My cold is still holding on, but Im doing my best to fight it off. Besides the two margarittas I had on Tuesday night, those were delicious to me and my week immune system. Dammit.

With this dish I had a few different ideas I wanted to explore. First was the black bean. As far as black beans go, after soaking and cooking them, personally I don't know if it was worth it. If you are serving for a large group or are super tight on cash, buying your beans in bulk is cheaper and they do taste delicious. But these days the canned organic black beans to me taste very close to making them yourself, and I don't know if it was worth my time. Even when you soak them overnight, they still have to cook for about an hour or more, and I normally don't have that kind of time. Also Im cooking for one or two most of the time, so preparing a ton of beans is almost more of a hassle.
So its up to you, no matter what I reccomend getting organic black beans, because they do not have a ton of preservatives and other crap they add into canned beans. Be sure to check the sodium of the beans too, its easy to get a ton of soduim in canned beans, and I know almost no one who needs MORE sodium.

roasted sweet taters, yum!
The second element of this dish was the sweet potatoes. My desire was to play with sweet and salty, which is where I got the idea to add cinnamon to the sweet potatoes. Recently I learned cinnamon is high in iron and magnesium, and in general a good spice to use. It adds sweetness but not sugar or carbs, which is AWESOME. To read more about this handy healthy little spice click here: Facts on Cinnamon

I found blending the sweet potatoes was unecessary. My idea behind this dish was to make a sweet potatoe puree hoping that it would make the quesadillas less messy. I hate when all my ingredients fall out of my quesadilla so in pureeing it I was hoping to eliminate that problem. They were still a bit messy, those sneaky black beans were all over the place, and the sweet potatoes were more of a paste than a puree. I used a blender, but looking back think it was unnecessary. The potatoes were better in paste form, but you can just mash them with a fork until they form a paste.

As far as the cayenne, healthy boyfriend is sensitive to spicy, so I only added a small amount to the sweet potatoes. If you know you like heat, add more, or omit the cayenne if heat aint your thang. Its good to note that cayenne is excellent for the immune system, so try it if you can!

This makes two whole quesadillas, so I recommend eating half of a quesadilla and a side dish of some sort of delicious green. Broccoli and Zucchini sautéed in a little oil and garlic was my side dish, but anything green and healthy will do.

Black Bean and Sweet Potato Quesadillas

The Goods: Serves 3-4
4 whole wheat tortillas
2 large sweet potatoes, chopped into 1 inch cubes
1 cup of black beans, warm
1 1/2 cups of sharp cheddar cheese, shredded
1/2 tablespoon grapeseed oil
A dash of salt and pepper
1/4 tsp ground cinnamon
A dash of cayenne(optional)

Note: If using canned black beans, omit step 1, and simply warm your canned beans in a pot over low heat.

The Deal:


1. Place one cup of pre-soaked black beans in a medium pot with three cups of water. Bring to a boil then reduce heat to meduim low and simmer beans for an hour or up to and hour and half. Remove any film that builds up on top on beans. Beans are ready when soft and most of the water has cooked down.

2. After the beans have been cooking for about 35 minutes, preheat oven to 375, and place sweet potatoes on a large baking sheet. Add olive oil to pan and toss with sweet potatoes, making sure to evenly coat all the sweet potatoes in oil. Lightly sprinkle with salt and pepper.
about to be roasted

3. Place sweet potatoes in oven and bake for 12-16 minutes, turning once to ensure even browning. Remove when sweet potatoes are lightly browned and a fork can be easily inserted.

4. Place sweet potatoes, cayenne, and cinnamon in a medium bowl and mash with a fork until the sweet potatoes form a paste.
Sweet potato paste
4. Grease your tortillas and place two, greased side down on your baking sheet. Spread the sweet potatoes mash on the quesadilla, making sure it is evenly distrubuted, then add half of your beans, and top with half of your cheese. Repeat with second tortilla. Place your last 2 tortillas on top, greased side up. Lightly press down the tortillas. Bake for 10-15 minutes, flipping once to ensure even baking.
Spreading on the paste!


5. Remove when cheese is bubbling and the tops of the tortillas are lightly browned. Cut into wedges and serve hot. Grab your favorite salsa and/or hot sauce, and get your eat on!

Tuesday, April 19, 2011

Pita Sandwich with Spinach, Hummus, Carrots, and Sprouts

Finding a fun healthy lunch every week is a real struggle for me. Not only does it need to transport easy, but it needs to have simple assembly, be nutrutious, and most importantly I need to WANT to eat it.

Salads are great, but I get bored with them easily. Though my love for salads has grown over the years, they are just not what I crave. Healthy boyfriend on the other hand makes the best salads on the planet. He has little patience in the kitchen and often does not care too much about presentation, but all that changes when he is making a salad. Watching him dart around the kitchen, looking for nuts, berries, seeds, anything and everything he can put on his salad to make it healthy, is a sight to see. He arranges them as if he is serving it to a guest, playing with color and design, always making sure the salad looks fit for a king. Its painfully adorable. Oh how I wish I had this trait!
I on the other hand will slave away cooking cookies or casseroles for hours, but when it comes to salad I cannot muster any patience. I use to call salads rabbit food, which in my head I think it still is. Salad is what I have to eat, so I can eat what I REALLY want, pizza, bagels, or simply bread and cheese.
Reflecting on this, I got the idea to put my salad in a pita pocket. Not a food revolution by any means, but I was excited by the idea of it. I literally said, "AHA!" outloud, it was a nice moment.  I was delighted to see that a pack of whole wheat pita bread was only $1.50! Also the ingredient list was shorter than most whole wheat breads, which means less chemicals and junk in my body. Im telling yall, pita bread is my new favorite bread. I use half of one whole pita, which only adds about 75 calories to my meal, but also adds fiber, and good carbs to keeps me fuller longer.

What I did is prepare enough ingredients for a large salad, and put about half the salad in the pita pocket and then eat the other half of the salad as a side dish. I plan to try several variations on this idea, so the vegetables below are a guide, but as I often say, use what you like and know you will eat. Of course be careful not to get stuck eating the same 5 vegetables every week. When you find a vegetable you love, high fives all around, but never forget variation is the spice of life, and nutritionally speaking variation is essential to whole body health.

These ingredients went marviously together, and I really enjoyed having the tangy flavor of the goddess dressing with the earthy flavor of the hummus. Im on a goddess dressing kick, but any healthy, preferably organic, dressing will do.

Hope yall enjoy my Pita sandwich/salad!

Pita Sandwich with Spinach, Hummus, Carrots, and Sprouts
a bit messy, but it makes up for it in flavor!
The Goods: Serves two
1 whole wheat pita pocket, cut in half
1 scallion, thinly sliced
5 cups of baby spinach
1 large carrot, shaved and thinly sliced
1 cup of sprouts(broccoli, alfalfa, etc)
2 tablespoons sunflower seeds, raw
2 tablespoons hummus, plain or garlic
1/2-1 tablespoon Annies Goddess Dressing


The Deal: 
1. Place sprouts, scallions, carrots, sunflower seeds and spinach in a large bowl and toss with Goddess Dressing, making sure dressing is evenly distributed.

2. With a knife spread 1 tablespoon of hummus in each pita pocket, spreading evenly.

3. Fill each pita pocket with half of the spinach mixture, and place any additonal spinach salad on the side to enjoy as a salad.

Saturday, April 16, 2011

Zucchini and Corn Quesadillas

Simple ingredients, beautiful colors
Ah the quesadilla. One of the most versatile, simple and down right delicious dishes out there. Cheap to make, and easy to stuff full of any vegetable you like. 

This week I have been riding the sick train to feeling yucky-ville, so have mostly been eating soup and toast, which sustains me but makes for a boring blog entry. I am feeling a bit better, and am ready to get my appetite and blog back on track. I missed a few days in a row of my spirulina smoothie and I suppose that was enough to let those sneaky germs in. So sneaky they are! 

My plan was to make a few varieties of quesadillas this week, but since I was interrupted by the sick train, I got a little of schedule. Not to fear, lots of yummy dishes to come. I must start with the zucchini because I bought it on Sunday and its starting to look like its headed for the Mr. Trashcan, but not if I can help it!

A simple trick to making your quesadillas healthier, is making sure you have more vegetables than cheese. The cheese is there to hold the dish together, but it should not be the main ingredient. I know in a perfect world cheese would be the main ingredient in every dish, but alas our world is far from perfect. So we must struggle through and use our cheese sparingly, as to not have the oh so unattrative cheese on our ass. I for one am looking a bit "cheesy" in some unattractive places and need to work really hard to eat healthier and exercise more.

The ingredients that I used worked wonderfully together, but you can use almost any vegetable you have around. I try to make sure I use vegetables with different textures, the crunch of the corn and the softness of the zucchini and onion balance each other beautifully. Whatever you use, just make sure you cook them first, because the vegetables will not cook in the oven.

For the zucchini, it does not matter how you cut them, you just need to make sure they are all the same size and that they are bite sized. Usually I cut them in semi-circles and they are fine, but I bought ridiculously huge zucchini so had to cut them into half moons and then half those.

A side of steamed broccoli or green beans goes great with this dish, or even a simple green salad. Just make sure you get your greens in!

Zucchini and Corn Quesadillas

The Goods: Serves 4, increase as needed
4 whole wheat tortillas
2 cups cheddar cheese, shredded
2 medium zucchini, halved and then thinly sliced crosswise
1 cup frozen corn
1 cup onion, coarsely chopped
4 cloves of garlic, minced
1/4 cup chopped fresh cilantro(optional)
2 tablespoon grape seed oil or canola oil

The Deal:
1. Preheat oven to 400 degrees. Heat the grapeseed oil on medium heat in a medium saute pan. Add garlic and cook until fragrant, about one minute. Add onions and cook until the onion is soft, about 5 minutes.

2. Add zucchini and corn to onion mixture and cook until zucchini is soft and corn is tender, about 6 minutes. Remove from heat and stir in cilantro if using.

3. Grease a cookie sheet and brush 2 tortillas with spray or oil and place them oil side down on a large baking sheet. Place a half of the zucchini filling on each tortilla, then half of the cheese, then the top with remaining two tortillas.

4. Bake for 10-15 minutes, flipping once to ensure even browning. Remove when tortilla is lightly golden and cheese is bubbling. Cut into wedges. Serve with salsa or your favorite hot sauce. Tapatio Yo!

Monday, April 11, 2011

Blondies with Chia Seeds

A blond making blondies, now THAT'S a Sunday! Any of my regular readers (aka my Mother and Christine) probably notice my desire to cook desserts on Sundays. This ensures I have a dessert to eat all week, and helps keep me away from a gummy bear massacre. It can get ugly, and full of red dye.

Good friends of mine make these little guys all the time, and I always have a hard time stopping at just one. I must confess I am not the hugest fan of brownies, I know how could I, but of all the incredible desserts out there, I think I can do better than brownies. Give me a brownie ice cream sunday and Ill grab a spoon, but I don't crave them.

Using chia gel again, which turned out beautifully. It cuts the amount of butter you have to use in half, which cuts out a lot of the fat. Of course making a dessert will almost never be "healthy", but these are healthier than any packaged cookie or candy bar you buy in the store. I find if I try to go all week without any sweets, I end up not being so...sweet, as it were, so I just keep working on moderation. Tis the key.

You can use 12 tablespoons of butter if you do not have chia gel, but I again encourage yall to try it. Look for Chia seeds in health food stores in the bulk section. A pound can be anywhere from $20-$30 bucks so if you can find it in a bulk section you can purchase a small amount and give it a try.


To make Chia Gel: To make 9 tablespoons or 1/2 cup and 1 tablespoon of chia gel, you put 9 tablespoons of water and 1 tablespoon of chia seeds in a bowl. Mix the seeds slightly, and then let rest for at least 20 minutes. It will create a gel, that looks grayish. It doesn't look appetizing, but doesn't taste bad. Try it, its mostly taste like water, with funny squishy things floating in it. To see pictures, view my previous post: chocolate chip cookies with chia seeds

Chocolate Note: You can really use any chocolate you want, just make sure its 6 ounces or 1 cup. I wanted  to try white and dark chocolate together, but you could use dark and milk, dark and peanut butter, all dark, all milk, the possibilities are what you make them. Chocolate possibilities.....yummy.....
Same thing with nuts, I used walnuts but pecans would be just as tasty. As always make sure you toast them first, it makes a big difference in the final outcome of your blondies. 

Blondies with Chia Seeds

The Goods: Makes about 20 big squares
1 cup walnuts or pecans
1 1/2 cups unbleached all purpose flour
1 teaspoon baking powder
1/2 teaspoon table salt
6 tablespoons butter or earth balance, melted and cooled
6 tablespoons chia seed gel(see note)
1 1/2 cups light brown sugar
2 large eggs, lightly beaten
4 teaspoons vanilla extract
3 ounces white chocolate bar, roughly chopped
3 ounces dark chocolate, roughly chopped(see note)

The Deal:
1. Heat a saute pan on medium heat, add nuts to pan and toast until they omit a nutty smell, about 8-10 minutes. Do NOT let them burn, they burn quickly, so flip the nuts frequently. 

2. Preheat oven to 350 and grease a 13 by 9 inch baking pan with butter or spray. 

3. Whisk flour, baking powder, and salt together in a medium bowl, set aside. 

4. Whisk melted butter, chia seed gel, and brown sugar together in a large bowl until combined. Add eggs and vanilla and mix well. Using a rubber spatula, fold flour mixture into egg mixture until just combined, do not over mix. Fold in chocolate and nuts and turn batter into prepared pan, smoothing the top with a rubber spatula. 
melted butter, chia gel, and sugar
Adding flour slowly into wet mixture
Adding chocolate and nuts
5. Bake until top is shiny, cracked and light golden brown, about 22 to 25 minutes. Careful not to overbake, once you are close to time, check every few minutes to ensure you do not over bake. 

6. Let cool for 5 minutes before serving, and cut into squares. 

Saturday, April 9, 2011

Baked Cauliflower with Salsa Verde

Whats green, white and yummy? This is!
And Im BACK. After a week of salty air, warm ocean water and eating out constantly I am relaxed and excited to be back in the kitchen. I was in Key West for a week and have been playing catch up since I returned, which is why I have not had an entry in almost two weeks(GASP!).

I am also on the broke side of things, so will be eating fairly simply for the next few weeks. I have some delicious ideas for meals, but Ill just put it out there I see a lot of beans and rice in my future. Lucky me, they are great for you!

This is an incredible dish to come back on. This dish is a full of interesting flavor, looks elegant, and is easy enough for most. Sometimes in mexican cooking its hard for me to come up with a side dish, and this is a perfect one. I made quesdillas with leftover ingredients and served this dish on the side, which was a hit. Healthy boyfriend loved the salsa and even his fairly unhealthy roommate gobbled up the stuff. Simple flavors that pack a punch are always my favorite.

The recipe comes from a book called, "A Homemade Life" by Molly Wizenburg. She is a very successful food writer and blogger and it all started with her starting a blog about food. Just like me! Her book is beautifully written, and the recipes are mouth watering. My mother(aka best mom on the planet) got me this book and I have been tearing through the stories and food advice. Inspirational as hell, yall.
For any of you out there more interested in blogging, definitely check out her book, fun fun fun!

Sometimes I am not the biggest fan of cauliflower, but I had never roasted it before. Holy smokes does it develop a new and hearty flavor that way. There are many things I need to try and I love the never ending variety at which vegetables can be prepared. As healthy boyfriends reminds me, baking is not as healthy as steaming, but for me flavor comes first, and a CLOSE second is nutrition. For him nutrition is always first, which is perhaps why he has no body fat and I have been sporting a belly most of my life. :) With all this cooking, hopefully flavor and nutrition will eventually become one in the same, but it takes time for that kind of skill. I can do it! So can you!

The colors of this dish are striking and I have a feeling this will be a dish I use often. This dish is cheap, easy and I cant say how deep the flavor is. If you are having company, I would absolutely put this on the menu.

Note: When you make you Salsa verde the first taste may be misleading. After I mixed all the ingredients  at first it was very spicy, so I was unsure how much salt to add. After it sat for 30 minutes or so, the flavors really balanced out and I seasoned it with a pinch more salt then. It is crucial for this salsa to rest for at least 30 minutes, to let the flavours develop. Let your flavors grow! Just make it first, and then once you prepare and bake your cauliflower, it will be ready.

Baked Cauliflower with Salsa Verde

The Goods: Serves 4 as side dish, serves 2 as a main dish


Salsa Verde
1 medium jalapeno, ribs and seeds removed, finely chopped
3 tablespoons cilantro, finely chopped
2 medium garlic cloves, minced with a pinch of salt
3 tablespoons fresh lime juice(1 large lime)
4 tablespoons olive oil
Salt to taste

Cauliflower
1 medium cauliflower(about 2 pounds)
2-3 tablespoons olive oil
Salt to taste

The Deal:
1. Preheat the oven to 450 degrees.

2. First prepare the salsa verde. In a medium bowl, combine jalapeno, cilantro, garlic, lime juice and olive oil and whisk to combine. Add two pinches of salt, or more to taste(see note). Set aside at room temperature for at least 30 minutes or up to an hour if possible.
can you see the flavors develop? 
3. Wash and dry the cauliflower well. Place on a large cutting board, stem side down and slice it vertically, top down, into 1/4 inch slices. You will probably only get 2-4 intact slices and the rest will be crumbs, thats normal, so don't fret.

4. Put cauliflower in a large bowl and toss with 2 tablespoons of olive oil, and use your hands to fully coat all the cauliflower. If you need more olive oil, add it, its imperative that all the cauliflower has a thin layer of oil.

5. Spread the cauliflower in a single layer on a heavy sheet pan, or use two if one is crowded. You do not want the cauliflower touching or it will steam instead of roast. Salt lightly.

No touching, NO touch!
6. Bake until the cauliflower is tender, and evenly browed in spots, about 20 to 30 minutes. You must turn the cauliflower once in the middle of baking to ensure even browning.

7. Serve Cauliflower warm and drizzle your now delicious salsa verde on top. Enjoy the grateful sounds you are sure to get from this easy and tasty dish!