Sunday, October 9, 2011

Who you callin a Tart? That's Apple to you!

Not perfect, its country yall.
This dish began where all dishes should, at the farm. Healthy boyfriend and I spent rather blustery Saturday afternoon at Grandad's Farm, in Hendersonville, NC. First thing healthy boyfriend did was purchase a piping cup of cider, which made walking around the farm much more enjoyable.
First a trip To Grandad's Farm
The intention was to go apple picking, but we soon saw most of the apples had been picked. We found many that had fallen to the ground, and ended up picking through the giant wooden crates that held apples of different varieties. I never knew how many types of apples North Carolina had. I've been seriously missing out on some delicious apples. I ended up buying a peck, which in layman's terms is a whole shit-ton of apples for two people. It was 22 apples precisely, for only $8 bucks. SA-WEET.
On the hunt
Is there anything better than apple picking followed by a sweet flaky homemade tart? If only I'd had time for a romp in the hay........I joke (sorta).
So many apples have fallen
I heart clouds
It's my APPLE CHART! From Left: Cameo, Stayman, Wine Sap, Mutsu, and Jana Gold
Everyone should make this dessert. The simplicity of the ingredients really helps the apple shine through. The pastry crust is flaky and a perfect "plate" for the apples to be shown off on. Trying to find the perfect apple tart recipe was tricky, so I combined two of the best ones I read. I used the crust from Orangette Blog, and used Jaques Pepin's way of preparing the apples. Recently I've been reading a lot of his book, Jaques Pepin's Table. He is so french and adorable, and his recipes are simply stunning. I have no doubt this is not my last apple tart, and I'm eager to try a variation or two.

Clearly the tart did not come out perfect looking, but the taste was exceptional. This was a dish I honestly couldn't believe I made. It tasted like something I would buy at a fancy bakery. Sure it took some time, but nothing was terribly complicated and it was, INCREDIBLE. I can't believe I'm saying this, but I think I like this better than apple pie. You really taste apple, and the crust is a part of the dish, but doesn't take over as in some apple pies. I still have apples left, so I'm sure there will be more apples dishes to come.

I did not get a chance to make the whipped cream, so it's not pictured. I'm sure it is delicious, I've had whip cream on a foot and it tasted delicious. Ok, not really. Point is, whipped creme makes everything better. 


There is no better time to make this recipe. Apples are season. Happiness is in season. Go pick some apples, find some happiness and get tartin! (I know I know, not a word)

Country Apple Tart
I miss you already...
The Goods: Serves 6-8


Tart Dough:
1 1/2 cups unbleached all purpose flour
1 tbsp sugar
4 tbsp ice water
9 tablespoons cold unsalted butter, cut into cubes
3/4 tablespoon salt

Apple Filling:
4 large golden delicious apples (1 3/4 pound) I used Stayman and Mutsu
1 tablespoon honey
4ish tablespoons sugar
1/2 teaspoon ground cinnamon
1 tablespoon unsalted butter

Heavy Cream for whipped cream
Drizzle of honey

The Deal:
1. In a food processor combine flour, sugar and salt and pulse to blend. Add butter, and pulse until the mixture resembles coarse meal; there should be no pieces of butter bigger than large peas. With the motor running slowly add the water, just until the dough begins to come together, about 10 seconds. If your down doesn't come together, add water, one tablespoon at a time, until it does.
Dough that is ready to be molded
2. Place dough on a wooden board or clean counter top, pressing the dough until it forms a ball. Press into disc about 1 1/2 inches thick. Pinch cracks together with your fingers, and then tightly wrap the dough in plastic wrap. Press it once more, massaging out any cracks, using the plastic wrap to help you form it into a smooth disc. Refrigerate the wrapped dough for at least 2 hours.
Disc with cracks
Smooth Disc, labeled and ready to chill
At this point the dough can be refrigerated for up to 4 days or frozen for 1 month. Thaw in refrigerator overnight before using.

3. Prepare your apples: peel, halve and core your apples. Arrange them cut side down on a cutting board and slice crosswise into 1/4 inch slices. Allow dough to soften slightly at room temperature before rolling out.
I used a tablespoon to scoop out the cores.
4. Preheat oven to 375, being sure your oven rack is in the middle position. On a lightly floured surface, roll the dough into a rectangle measuring approximately 11 by 16 inches. Transfer dough to a cookie sheet.
Next time I'll smooth out my edges.
5. Arrange apples over the pastry in 5 rows, leaving a one inch border, overlapping them like solitaire cards. Mix cinnamon and sugar together in a small bowl. Drizzle honey over the tart, then sprinkle the sugar honey mixture evenly over the tart. Dot with one tablespoon of butter.
I only fit four rows
6. Fold the edges of the pastry over the apples to create the one inch border. Bake tart until the pastry is crisp and the apples are tender, about 35-45 minutes. Remove from heat and let cool on the pan.
It's a tart! It's a tart! 
7. Cut into 8-10 slices and serve luke warm or room temperature with honey sweetened fresh whip cream. Yum!
Do not eat this by yourself. Tarts are for SHARING. 

Friday, October 7, 2011

Did someone say pie? Crust baby!

When I die, bury me in a giant pie. That's my motto! That I just made up. Have any of yall have seen "Waitress"? If you are like me, at the end you thought more about all the mouth watering pies than the actual plot. Though Kerry Russel will always have a special place in my heart, given the college years I spent watching Felicity (even post hair cut). Nallion Fillion can do no wrong, and I'll bake him a pie any day, if you know what I'm saying...... I'm saying he is crazy hot.

Regardless everyone should have a solid pie crust recipe in their pocket, because homemade crusts are the best. No store bought variety will compare, and if they do it's likely they are full of chemicals, partially hydrogenated oils, or plain ole expensive. I understand the impulse for pre-made crusts, homemade crusts take a while. Lots of time you don't need to be in the kitchen, but you do need a good 2 + hours to get it done. It's WORTH your effort, trust me. I read a bunch of different recipes, and each one had roughly the same steps. It may seem overboard to chill the dough, roll it out, then chill again, but these steps are vital. Light and flakey crusts happen when the dough and butter are cold when they go in the oven. Skip steps at your own dry brittle crusts risk.

Since I was the only one in the kitchen, I did not get any decent pictures of how to make your pie crust edge fancy. Decorative Pie Crust Edges, has lots of different ideas for crusts, so click on the link to pick your edge. I used the simple fluted pinch edge, but will be trying more in the future. There is a braided edge that looks adorable!

Pie season is upon us. There is no better time to perfect your pie crust. Many pies to come, so stay tuned!

Single-Crust Pie Dough
Adapted from America's Best Test Kitchen
Before being baked
This recipe makes enough for one 9 inch pie crust. For two crusts simply the double recipe. Be sure to have cold butter, freezing it works best, and ice cold water. These are key for a light flakey crust. Do NOT over-mix your dough.
The Goods: 
1 1/4 cup unbleached all purpose flour
1/2 teaspoon salt
1 teaspoon sugar (increase to 1 tablespoon for sweet recipes)
8 tablespoons butter, cut into 1/4 inch pieces and chilled (in freezer if possible)
4-6 tablespoons ice water

The Deal: 
1. Process flour, sugar, and salt in a food processor until combined. Scatter butter over the top and continue to process until the mixture has the texture of coarse sand, about 10-15 seconds. Transfer to a bowl.

2. Sprinkle 4 tablespoons of ice water over the mixture. Stir and press the dough together, using a stiff rubber spatula, until the dough comes together. If the dough is still dry, stir in remaining water, one tablespoon at a time until it comes together. Form the dough into a 4 inch disk, wrap tightly in a plastic wrap, and refrigerate at least one hour.
Do not over mix the dough
Label EVERYTHING. Memories fail, sharpies are forever.
At this point the dough can be refrigerated for up to 2 days or frozen for 2 months. Thaw on countertop until malleable before rolling. 

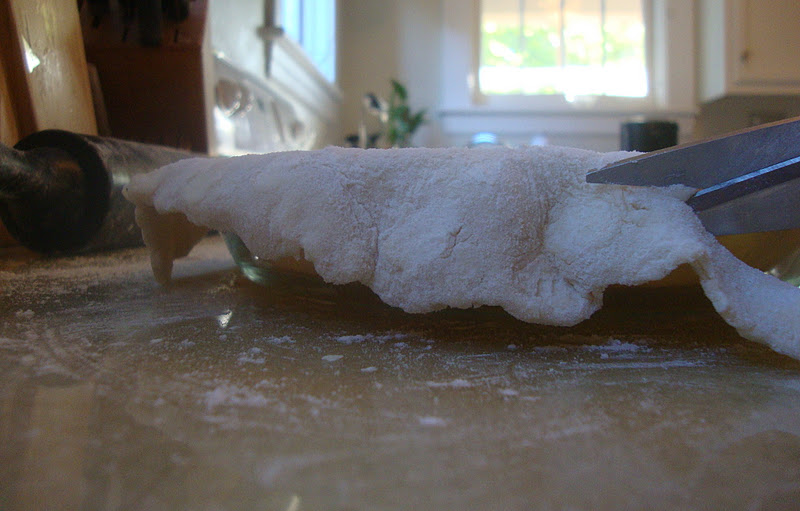
3. Let the chilled dough soften slightly at room temperature before rolling it into a 12-inch circle and fitting onto a pie plate. Trim extra dough with kitchen sheers so there is 1/2 inch edge hanging over the pie plate. Tuck the folded edge underneath itself to form a doubled rim that sits on the lip of the pie plate. Make edge of your choice (see decorative edges above). Freeze until firm, about 30 minutes.
Roll out crust, dots of butter are a good thing
Trim the edge, save left over dough in case you need to patch
pinching the dough
fluted edge :)
4. Be sure your oven rack is at the lower-middle position and heat oven to 375. Cover your pie with aluminum foil, being sure to fully cover the edge of the crust to prevent burning, and fill with pie weights (I used dried beans and rice, pennies work well). Bake until the pie dough looks dry and is light in color, about 25-30 minutes.

5. If you need a partially baked crust (also referred to as blind baking), transfer to a wire rack and remove pie weights and foil. For a fully baked crust, remove pie weights and foil and continue to bake until the crust is a deep golden brown, about 12 minutes longer.

A fully baked pie crust can be stored at room temperature wrapped tightly in foil for up to two days.

Wednesday, October 5, 2011

Swiss Chard: 1, Lysandra: 0


Two Steps forward, three steps back right? That's what they say and that's how I feel after eating Chard. After eating vitamin E, C, K, iron, magnesium rich, cancer preventing Swiss Chard, I am sad to say I still don't like the taste of it. Cooked spinach is my nemesis, I HATE the way cooked spinach tastes. I love it fresh, or even cooked into a pie or quiche, but on it's own....UGH. Frustrating that I have conquered my aversion to so many other vegetables, yet cooked greens such as Chard, Kale, and Spinach, continue to repulse my taste buds. Frack.

Healthy boyfriend of course, Mr. I love everything that taste nutritious, adored this and commented on what an extremely healthy meal it was. Which is true and everything besides the flour for the gnocchi was from the local market; a great accomplishment in itself. I know I can grow to love this stuff, perhaps I have to take baby steps? I will trying baking it in a quiche soon, a little egg and milk to help it go down easier. Not the healthiest option, but perhaps it will help warm my taste buds up to the flavor.

My intention when making this was to pair the Sweet Potato Gnocchi, that has a nice cinnamon sweet taste with the garlic earthy chard, balancing out the flavors. Healthy boyfriend thought it worked great, while I mostly nibbled on gnocchi. I will try cooking broccoli this way soon, and I'm sure I'll be licking the bowl.

This recipe comes from Simple Vegetarian Pleasures. I wish I knew how Jeanne Lemlin is reading my future from the past, but every time I need a recipe, she is there. Her books are simple genius, go buy them. If you know you like Chard, this is a very simple and delicious way to make it. Im sure anyone with normal healthy taste buds is sure to enjoy it.

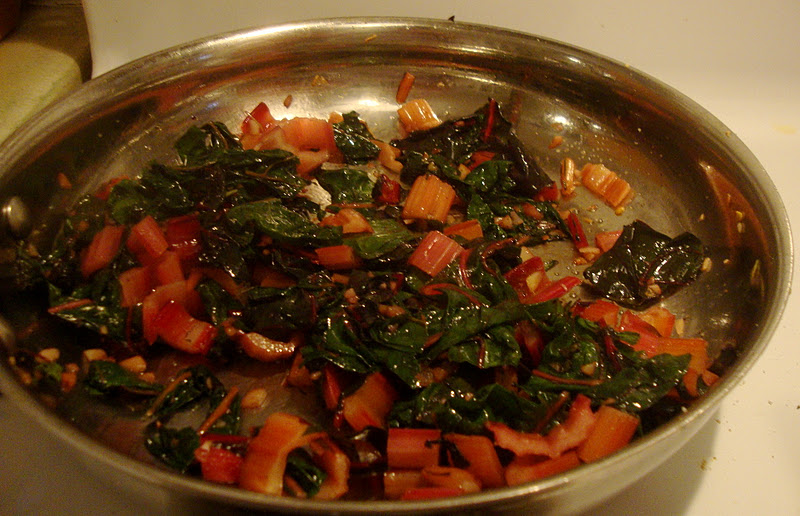
Swiss chard is another vegetable adding bright rainbow colors to farmers market tables right now, another reason to visit your local market!

Garlic Rainbow Chard
Purdy Colors
You can really use any dark green vegetable, kale, collards, broccoli would all be delicious. 


The Goods: 
1 pound Swiss Chard with stems
2 tablespoons parmesan cheese, grated
4 tablespoons olive oil
4 garlic cloves, minced
1/4 teaspoon crushed red pepper
1 pound Sweet Potato Gnocchi or store bought
1/4 teaspoon salt
Pinch freshly ground pepper
1 teaspoon fresh rosemary, minced

The Deal: 
1. Chop the steams of the chard. Rinse stems under running water to get rid of any sand or dirt. Repeat with leaves. Chop steams into 1/2 inch pieces, and gather leaves into bunches and chop them into 1/2 wide strips.

2. Heat 1 tablespoon olive oil in a large skillet over medium high heat with rosemary. Heat until hot but not smoking. Add gnocchi and cook until browned, about 3 minutes on each side. If you prefer your gnocchi boiled, you know, do it that way.

3. In another large skillet heat 3 tablespoons olive oil on medium heat with the garlic and hot pepper flakes. Cook one minute then add the chard leaves and steams. Toss to throughly combine then cover pan. Cook, tossing occasionally, until the chard is just wilted, about 3 minutes. Season with salt and pepper to taste.

4. Serve gnocchi and greens in one bowl and sprinkle parmesan on top.

Tuesday, October 4, 2011

Oh Gnocchi you didn't

You want it.
Ok yall, this is a long but super high five yourself worth the effort project. For homemade pasta, this is as healthy as it gets. Sweet taters and whole wheat flour, I mean talk about your wholesome pasta treat.

I'll admit it. I'm a gnocchi addict. I've tried to cut back, but I JUST CANT STOP. It's become one of my go-to's this summer when I have no idea what to eat; Homemade spinach pesto and store bought gnocchi, with a side of steamed broccoli. The problem is I either buy slightly pricey gnocchi at the farmer's market or slightly processed gnocchi from the grocery store.
Well those days are over. Homemade gnocchi here I come. I found this recipe on a blog I recently discovered, Kath Eats Real Food. Click on the link and find a ton of healthy recipes, adorable photos and general sillyness. Great site to explore!
Good to have red wine to get you through :)
Sweet potatoes are one of my favorite vegetables because they are so freaking good for you, while still being delicious no matter how you serve them. Sweet, savory, fry like, it's nearly impossible to mess them up. They are crazy high in beta carotene which is full of Vitamin A and C. They also have vitamin E, and are high in fiber (which many of us need more of). In general they are the BOMB, and should be a staple vegetable in your house. Especially right now, its sweet potato season yall!

In researching a good site with nutritional information I found this Sweet Tater Facts, which is a North Carolina Commision on sweet potatoes. What do their meetings look like? Are they all, "I agree, Ill have sweet potatoes fries with that!" or "I do not agree with you, please take your sweet potato casserole out of my sight." One can only spend too much time wondering.......

Nothing in this is hard, just time consuming. Definitely a weekend project for any full time 9-5ers. Luckily unless you are making these for a large group, you will have plenty leftover to freeze, and then you have gnocchi whenever you want it.
My goodness, is this ANOTHER reason to visit your local farmer's market? I think so!

Sweet Potato Gnocchi
Gnocchi on a bed of garlic rainbow chard. Nom Nom. 

The Goods:
2 large (about a 1.5 pounds) sweet potatoes
1 egg
1 1/2-2 cups whole wheat flour
1 teaspoon cinnamon
3/4 teaspoon kosher salt
1 tablespoon grapeseed oil
1/2 teaspoon rosemary, minced
Dash nutmeg (optional)

Any Sauce you like with gnocchi. I'm a Spinach Pesto girl, but to each her/his own sauce. You can also serve it on a bed of garlic greens, recipe soon to come.

The Deal:
1. At 375 degrees bake sweet potatoes for about an hour, until a knife can be easily inserted. Overcooked is better than under, you want the flesh soft.

2. When ready, cut open lengthwise and open to cool for 10 minutes or so.

3. When cool enough to touch, peel of skins with your hands and place all potato flesh in a large bowl. Add salt, cinnamon, nutmeg, and egg to taters and stir to combine.
Taste, add more cinnamon or nutmeg if desired
3. Begin adding flour, starting with a cup and adding slowly to see if you're dough is forming. The dough should lose most of it's stickyness and when you push it with your finger it should only spring back a smidge (instead of completely molding to your finger.)

4. Turn the dough ball onto a flour surface and knead into a tighter ball. Use as much flour as you need to keep the ball from sticking to the surface and your hands.
Dough ball
Quartered
5. Quarter the dough ball and set each one aside. Take one quarter and roll into a long tube (make a snake sound if you wish, ssssssss!) It should be about as thick as your finger, but only if you can roll it that thin without the dough breaking. If your dough is breaking, pinch it together and stop there.
Gnocchi snake goes through the hole :) Healthy boyfriend likes to play with his food.
6. Cut the tube into about 1inch long nubs, and set aside. Repeat with remaining dough quarters. While you are rolling and nubbing (not a verb....yet!) bring a large pot of water to a boil.
These are already cooked, just notice the size of the gnocchi.
7. Prepare an ice bath (water+ice+bowl=ice bath). Add half the gnocchi to the boiling water and boil for about 4-5 minutes, until the gnocchi float up and start dancing with the rolling water. Remove with slotted spoon and plunge into the ice bath to stop cooking. Let the gnocchi cool off for 2 minutes and then remove to a separate container. Repeat with remaining gnocchi.

*At this point you can freeze them for later use. Spread on a cookie sheet with wax paper and freeze. Once frozen, place in a labeled ziplock. Then you have gnocchi for life.....or as long as they last. Thaw once ready to use.

8. When ready to eat, heat oil in a large saute pan with the rosemary. When hot (aka you flick water in the pan and it sizzles) add your gnocchi and coat with oil. Get a good crust on each side, about 3 minutes per side. Remove when lightly browned.

Sit back, relax and let the compliments roll in.

Sunday, October 2, 2011

Sweet Potato Hash with Curry Spices


This post could also be called I was lazy and wanted sweet potatoes. Or how to not cook much but have something crunchy. Thursday night I had a familiar hankering for sweet potatoes but needed to try something new for blog posting purposes. I would probably roast root vegetables in greek dressing five nights a week if not for the need to come up with original recipes for my blog.
So I quickly searched a few of my favorite sites, looking for recipes that required no additional food purchases and minimal actual in the kitchen time. Two Blue Lemons to the rescue! (click on the name and transport yourself to a lovely site)

I tinkered with the original recipe a bit, adding cinnamon because I think sweet potatoes and cinnamon should get married and have babies. The original dish also called for poppy seeds, but I had sesame so thats what went in. I should have made it more breakfast themed, made a couple spicy scrambled eggs to lay on top, but as was came out pretty good. I had some spinach so I sliced it fancy-like and threw it on top for some iron and color. This recipe can be used in a lot of different ways, so I hope you will find your own way to make this simple hash your own.

I have a strange sensation this dish is missing a certain I don't know what yet. But I'm sure I will, at some point, figure it out.

This would also be great with breakfast; with an egg on top, avocado, sour cream, or salsa. These are versatile so use what spices you have. If you need to make brunch for a big group this is a quick way to make a large quantity of hash browns and leave you stove open for other cook to order type items.

Remember sweet potatoes are in season, so buy local! Sweet potatoes keep for a while and can be used in almost anything. Go get some from a farmer, that's a good day for everyone.

Sweet Potato Hash with Curry Spices
Green and orange food. It's Fall, get used to it. 


The Goods: Serves 3-4 as side dish
3-4 small sweet potatoes ( I used 1 big un, and 1 little un)
1 red onion
2 tablespoons whole wheat flour
1 tablespoon sesame seeds
1 teaspoon salt
1 teaspoon coriander
1 teaspoon cumin
1 teaspoon curry powder
1 teaspoon garlic powder
1/2 teaspoon cinnamon
1/4 teaspoon cayenne
1/2 cup fresh spinach, chiffonade

The Deal: 
1. Preheat oven to 400 degrees. Grate (by hand or using a grater attachment on your food processor) the sweet potato and onion. Grating an onion sucks for your eyes, power through! Transfer the onion potato mixture to a sieve and squeeze with your hands to release as much moisture as you can.
I don't have a sieve so I used a strainer.

2. Dump in a bowl and add spices. Mix well with your hands to make sure everything its coated in yummy spices.
About to be hash...
3. Shake in an even layer on to a pre-greased cookie sheet and bake until bottom starts to brown. Scrape and toss once and continue to bake until new bottom is crispy. Total cooking time is about 25-35 minutes, depending on the the amount of moisture in your sweet tater mix.

4. Serve hot with spinach sprinkled on top. 

Friday, September 30, 2011

French Green Beans with Herbs

Its so easy being a french green bean!
Oh boy it's haircot verts! Skinny mini grean beans that are so cute, I want to make clothes and hats for them. Unlikely I ever will because who has that kind of time? Guess I'll have to dress them up with butter and herbs, that's about as fancy as I get.

Haricot verts, aka french green beans, are in season right now along with their thicker counter part, good ole regular green beans. Green beans hold a special place in my vegetable heart, being they are one of the few vegetables I've always loved. Of course I used to only eat green beans when they were smothered in cream of mushroom and had crispy "onions" on top, but now I even eat green beans without the casserole. Not that there is anything wrong with green bean casserole, still being one of my favorites at Thanksgiving. Though now I'm just as happy eating green beans steamed, no cream needed.

I looked at a few different recipes for cooking haricot verts with herbs and they all looked as if they used roughly the same method. Par boil, place in ice bath, cook onions in butter, add the beans and finish with herbs. As far as the herbs go, if you have an herb garden use all the herbs I added. Each herb adds a nice flavor, but don't feel required to use every herb listed below, especially if you fear any unused herb is likely to be trash bound.

For me learning to cook is about being conscious of my food choices. So buying 5 different fresh herbs, using a tablespoon of each and then trashing the rest, is not what I call conscious eating. If you have a plan for the rest of the herbs, rock on, go get a satchel of each; but before you go to the store, think about each item you are buying and what you will be using it for. The waste in this country is frustrating, mostly because people don't think to care. Of course it's annoying to plan all your meals. Food is precious, but the wasteful path we as a society our on is not sustainable. So why not start thinking ahead? Everyone has their own unique excuse of why they "just don't have the time". Food, in one way or another, is essential to most living things survival. Food is literally life, why not treat it with the respect it deserves?
Well that turned it to a bit of tangent, but I hope you think about the ideas behind it. Sometimes I feel discouraged about the future and about the lack of foresight I see in humanity. One meal at a time I suppose.

Getting back to green beans, feel free to use the herbs you have. I used parsley and chives, because those were the only two healthy boyfriend could find at the market. Listed below are all the recommended herbs, but my previous paragraph said enough about using herbs the smart way. This is simple way to serve green beans if you are having guests and want something that looks fancy, but is easy and quick. Cooking the onions first gives them time to caramelize, which obviously adds a light sweetness to the dish. In general I don't go to this much trouble for beans, being happy to eat them steamed, but now I have a go-to side for future dinner guests. Now I just need more guests.....

This recipe is adapted from a few different sources and can be used with traditional green beans. But remember if you get french green beans you can practice saying "Haricot Verts" in the most ridiculous french accent you can think of. Worth it.

French Green Beans with Herbs

The Goods: Serves 4 as side dish
1 pound thin green beans (haricot verts) trimmed
1/2 cup red onion, diced
3 tbsp butter or earth balance
2 tbsp fresh thyme leaves
2 tbsp fresh parsley, chopped fine
2 tbsp fresh chives, chopped fine
2 tbsp fresh basil, chopped fine
Salt and pepper to taste
Lemon Wedges (optional)

The Deal: 


1. First we blanch (a fancy way to say boil, chill and slowly reheat vegetables): Bring large pot of salty water to a boil. Fill a large bowl of ice with water. Boil the beans for 2-3 minutes until tender but still crispy. Quickly remove beans with slotted spoon and plunge into ice bath to stop cooking and retain the color. Pat dry with cloth or paper towl.

2. In a large saute pan heat butter on medium high heat. Cook onions until translucent about 3-5 minutes. If you desire the onions caramelized cook an additional 2 minutes until lightly browned. Add the green beans, tossing to evenly coat with butter. Cook until tender about 4-6 minutes.

3. Add herbs, salt and pepper, and toss to combine. Cook for an additional minute.

Serve hot with lemon wedges on the side if desired. Eat with your fingers if extra sillyness is needed.

Thursday, September 29, 2011

Cheese Straws

Cheese, Basil, Puff Pastry. All I can ask for.
Growing up in Winston-Salem meant a few odd things. In the middle of downtown there is a giant bank that looks like a penis, we are the only city in the country that has a hyphen in our name, and we have a mini historic town, Old Salem, that makes the best damn cheese straws in the land.

Old Salem is a town, roughly the size of a mall, purposefully frozen in time. So us future looking folk can get a feel of how products were made before electricity and see people in funny old timey clothes.
We had to go every year in elementary school, and while the history was interesting and it developed a fairly serious love of the bonnet within me, the memorable part was the cookies and cheese straws.
If you have never experienced a moravian ginger cookie, than your mouth is shedding a tear right now. Not drool, they are tears. The cheese straws are little sticks of crack, and it was not uncommon for a box of those straws to disappear in our house in one evening. Even if the only person home was me. Oooppps.

What drew me to this was the simplicity. Well obviously it was the cheese that called to me, but simplicity was a close second. The only thing that takes some thought is defrosting your puff pastry. Making sure they cook up flakey and delicious, you cannot rush defrosting. There are many variations, if you want to add cayenne to spice them up, different herbs or seeds to deepen the flavor, there really is no end to what you can do. To defrost puff pastry you can leave it in the fridge overnight (at least 8 hours) or sit it on the counter for an hour or so. It should be soft, but still cold.

As far as puff pastry, Martha Stewart doesn't even make her own. If Martha doesn't, neither do I. Essentially this decadent dough, consists of pastry dough wrapped around a block of butter and folded slowly over many hours, which creates light buttery layers. Sure that sounds like what I imagine heaven to taste like, but who has the time to make it? The french, thats who.

I use pepperidge farm puff pastry, but hope to find a better alternative. Pepperridge farm uses HFCS, which I prefer to keep out of my body, but am limited by the options available. Trader Joes has a great puff pastry, as does whole foods, though the price difference at whole foods is noticeable.

If you are looking for something to serve at a party, or need an appetizer that is simple yet fancy, look no further. These puppies are it.

Cheese Straws

The Goods: Serves 6-8 as appetizer
1 sheet puff pastry, thawed
3/4 cup parmesan cheese, freshly grated (Use a food processor for quick grating)
1 tablespoon fresh basil, minced
1 tablespoon sesame seeds (optional)
A good dash of sea salt and fresh ground pepper

The Deal:
1. Preheat the oven to 425 degrees. Line a large baking sheet with parchment paper.

2. Be sure you puff pastry is fully defrosted and fold out onto a smooth surface. If it cracks, pinch the cracks together and use a rolling pin to smooth out into a 10 inch square. Evenly sprinkle cheese, basil, sesame seeds, salt and pepper on the pastry. Using another sheet of parchament, place it over the pastry and use your rolling pin to gently press the cheese mixture into the pastry.
The dough and cheese before slicing and baking
3. Cut into thirteen 3/4-inch-wide even strips. Holding opposite ends of the strip, gently twist the pastry so it forms a twirl, then transfer to the parchment lined baking sheet. Repeat with remaining strips. The cheese mixture many crumble off, no worries, just place the twist on the baking sheet. Once you have twisted all your sticks, press any cheese into places that lost some. They do not need to look perfect, in fact a few of mine split in half. A little twist goes a long way.

4. Place baking sheet on the upper rack of your oven and bake for about 10 minutes or until golden brown. Reverse the position of the baking sheet to the lower oven rack halfway through. Remove from heat and serve warm.

They will keep in a airtight container for 48 hours, but are best served hot. Let cool completely before storing.